
World’s Easiest No-Knead Artisan Yeast Bread Recipe
Introduction
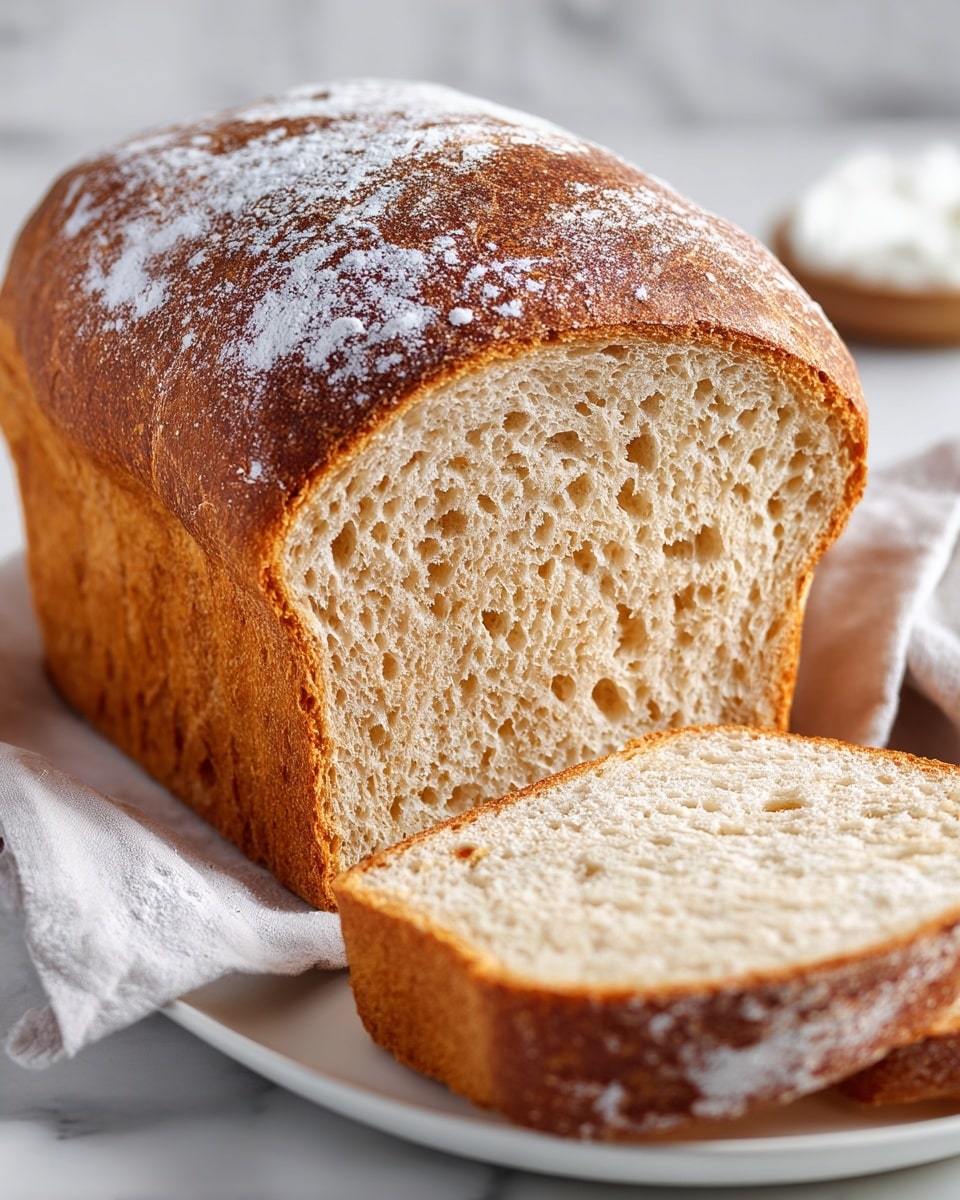
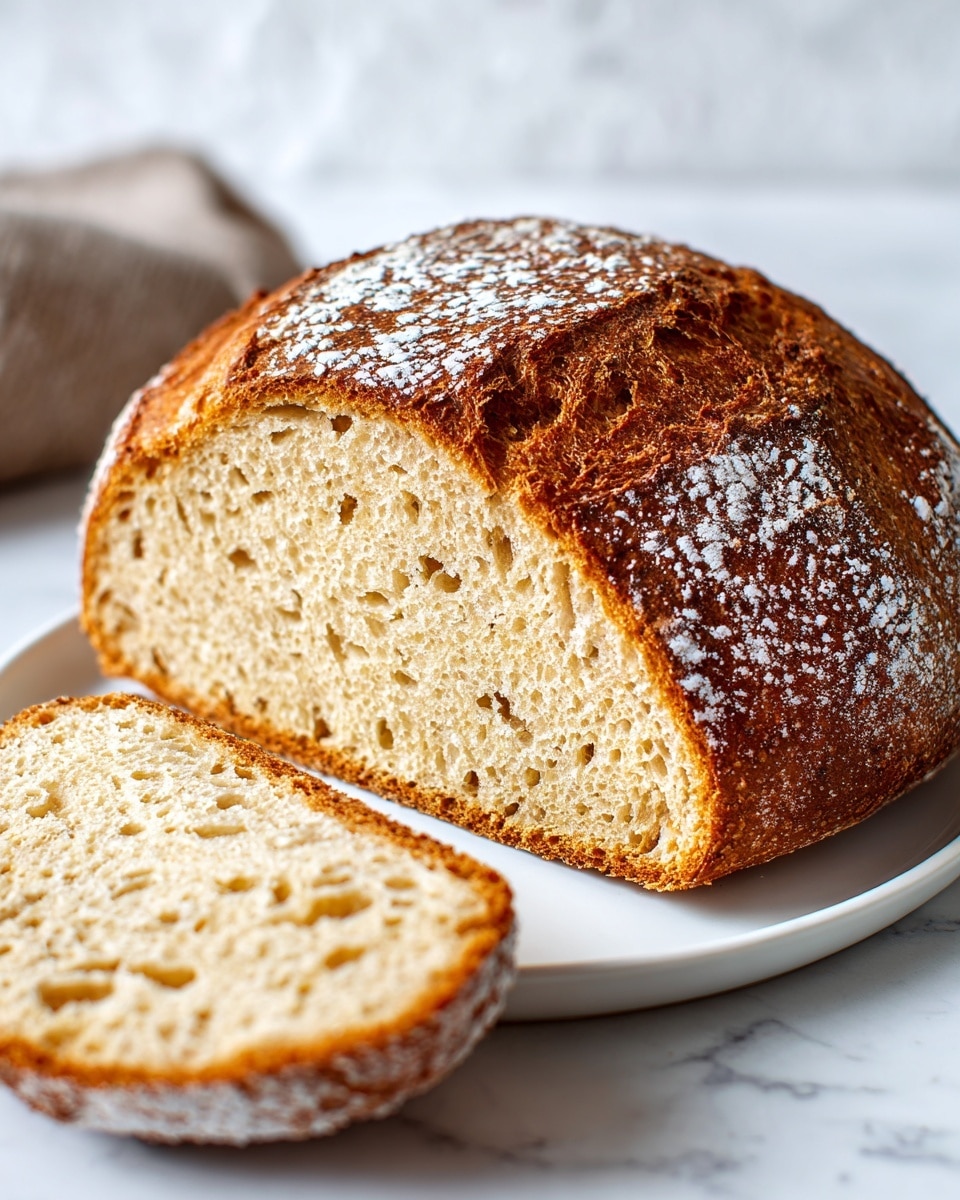
This is the world’s easiest yeast bread recipe—an artisan-style, no-knead loaf that yields a crispy crust and soft, airy interior. With just a few simple ingredients and minimal hands-on time, you can enjoy homemade bread that tastes like it came from a bakery.
Ingredients
- 3 cups (450g) flour (bread or plain/all-purpose)
- 2 tsp instant or rapid rise yeast
- 2 tsp cooking or kosher salt (not table salt)
- 1 1/2 cups (375 ml) very warm tap water (up to 55°C/130°F, not boiling)
- 1 1/2 tbsp flour (for dusting)
Instructions
- Step 1: Mix flour, yeast, and salt in a large bowl. Add very warm water and stir with the handle of a wooden spoon until all the flour is incorporated. The dough will be wet and sticky—not kneadable but not runny. Adjust with a little more water or flour if needed to get the right consistency.
- Step 2: Cover the bowl with cling wrap or a plate and leave it on the counter for 2 to 3 hours until the dough doubles in volume, looks wobbly like jelly, and has a bubbly surface. If it hasn’t risen after 1 hour, move it to a warmer spot.
- Step 3: Optional: Refrigerate the dough for up to 3 days to develop more flavor. If refrigerated, bring it back to room temperature by leaving it on the counter for 45 to 60 minutes before baking.
- Step 4: Preheat your oven to 230°C (450°F or 220°C fan) and place a Dutch oven with the lid on inside to heat for 30 minutes.
- Step 5: Lightly flour your work surface with 1 tablespoon of flour. Scrape the dough out of the bowl and sprinkle 1/2 tablespoon of flour over the top.
- Step 6: Using a dough scraper or similar tool, fold the dough’s sides inward about six times to roughly shape it into a round loaf. This helps deflate the dough and make it manageable without worrying about perfect shaping.
- Step 7: Place a large piece of parchment paper beside the dough and flip the dough upside down onto it so the smooth side is up and the seam side is down. Slide the dough toward the middle of the paper and lightly reshape it. Don’t worry if it’s uneven—this creates crunchy, rustic ridges.
- Step 8: Carefully remove the hot Dutch oven from the oven. Use the parchment paper to lift and place the dough into the pot, then cover with the lid.
- Step 9: Bake the bread covered for 30 minutes. Remove the lid and bake for another 12 minutes until the crust is deep golden and crispy.
- Step 10: Remove the bread from the oven and let it cool on a rack for 10 minutes before slicing.
Tips & Variations
- Use a kitchen scale for accurate flour measurement to ensure consistent results.
- For a softer crust, brush the loaf with melted butter after baking instead of baking uncovered for the last 12 minutes.
- Try adding herbs, garlic, or olives to the dough for extra flavor.
- If you don’t have a Dutch oven, bake the loaf on a preheated baking stone or heavy baking tray and place an oven-safe bowl of water inside to create steam.
- Letting the dough rise overnight in the fridge enhances flavor and requires less active prep time.
Storage
Store leftover bread at room temperature wrapped loosely in a clean kitchen towel or paper bag for 2 to 3 days. For longer storage, slice and freeze the bread in an airtight bag for up to 3 months. Reheat slices in a toaster or oven until crispy. Avoid refrigerating bread as it dries out faster.
How to Serve
Serve this delicious recipe with your favorite sides.
FAQs
Can I use active dry yeast instead of instant yeast?
Yes, but you’ll need to activate active dry yeast in warm water for about 5 to 10 minutes before adding it to the flour. Instant yeast can be mixed directly with the dry ingredients.
Why is my bread dough too sticky or too runny?
Dough stickiness can vary depending on flour type and humidity. If it’s too sticky to handle, sprinkle in a bit more flour and gently fold it in. If too runny, add a small amount of flour gradually until it holds shape but remains soft and tacky.
PrintWorld’s Easiest No-Knead Artisan Yeast Bread Recipe
This World’s Easiest Yeast Bread recipe creates a rustic artisan loaf with minimal effort using a no-knead technique. The dough is mixed and left to rise slowly, then baked in a preheated Dutch oven to develop a crispy crust and chewy interior. Perfect for beginners, this bread requires just a few simple ingredients and yields a delicious homemade loaf with a tender crumb and golden crust.
- Prep Time: 10 minutes
- Cook Time: 42 minutes
- Total Time: 2 hours 52 minutes (including rising time)
- Yield: 1 loaf (10 servings) 1x
- Category: Bread
- Method: Baking
- Cuisine: Artisan
Ingredients
Dough Ingredients
- 3 cups (450g) flour (bread or plain/all purpose)
- 2 tsp instant or rapid rise yeast
- 2 tsp cooking or kosher salt (not table salt)
- 1 1/2 cups (375 ml) very warm tap water (up to 55°C/130°F, not boiling)
For Dusting
- 1 1/2 tbsp flour (for dusting)
Instructions
- Mix Dough: In a large bowl, combine the flour, yeast, and salt. Add the very warm water and use the handle of a wooden spoon to mix until all flour is incorporated. The dough will be wet and sticky, not kneadable or too watery. Adjust water or flour if necessary for the right consistency.
- Rise: Cover the bowl with cling wrap or a plate and leave it on the counter for 2 to 3 hours until the dough doubles in size, becomes jiggly, and the surface appears bubbly. If it hasn’t risen after 1 hour, place it in a warmer spot.
- Optional Refrigeration: For enhanced flavor development, you may refrigerate the dough for up to 3 days at this point. Otherwise, proceed immediately to baking preparations.
- Bring to Room Temperature: If refrigerated, allow the dough to come to room temperature by leaving it on the counter for 45 to 60 minutes while preheating the oven. Cold dough rises less effectively.
- Preheat Oven: Place a Dutch oven with its lid inside the oven and preheat to 230°C (450°F) or 220°C fan for 30 minutes prior to baking.
- Shape Dough: Lightly flour your work surface with 1 tablespoon of flour. Scrape the dough onto the surface and sprinkle about 1/2 tablespoon of flour on top.
- Fold Dough: Using a dough scraper or similar tool, fold the dough sides inward approximately six times to form a rough round shape, which helps deflate bubbles and shape it for baking.
- Transfer to Parchment: Place a large piece of parchment paper next to the dough, then invert the dough onto it so the seam side is down and the smooth side is up. Slide it gently toward the center and reshape if needed; an uneven shape creates more crunchy ridges.
- Place in Dutch Oven: Carefully remove the preheated Dutch oven from the oven, use the parchment paper to lift and place the dough inside, then cover with the lid.
- Bake Covered: Bake the dough covered for 30 minutes until the crust sets and begins to brown.
- Bake Uncovered: Remove the lid and bake an additional 12 minutes uncovered to develop a deep golden and crispy crust.
- Cool and Serve: Remove the bread from the oven and transfer it to a wire rack to cool for 10 minutes before slicing and serving.
Notes
- Use bread flour or plain/all-purpose flour as per availability; bread flour gives a chewier texture.
- Instant or rapid rise yeast is preferred; active dry yeast may require adjusting proofing time.
- Use cooking or kosher salt rather than fine table salt for better flavor control.
- Water should be warm but not hot, ideally around 55°C (130°F) to activate the yeast properly without killing it.
- Adjust dough consistency with additional water or flour if necessary; it should feel wet but not runny.
- If the dough isn’t rising well, place it in a warmer environment to encourage fermentation.
- Preheating the Dutch oven is crucial for creating steam and achieving the artisan crust.
- If you don’t have a Dutch oven, bake on a preheated baking stone or baking sheet and add a tray of hot water to create steam.
- Refrigerating the dough slows yeast activity, developing flavor over time and improving texture.
Keywords: no knead bread, easy yeast bread, artisan bread, homemade bread recipe, rustic bread, Dutch oven bread


