
Peppermint Cheesecake Recipe
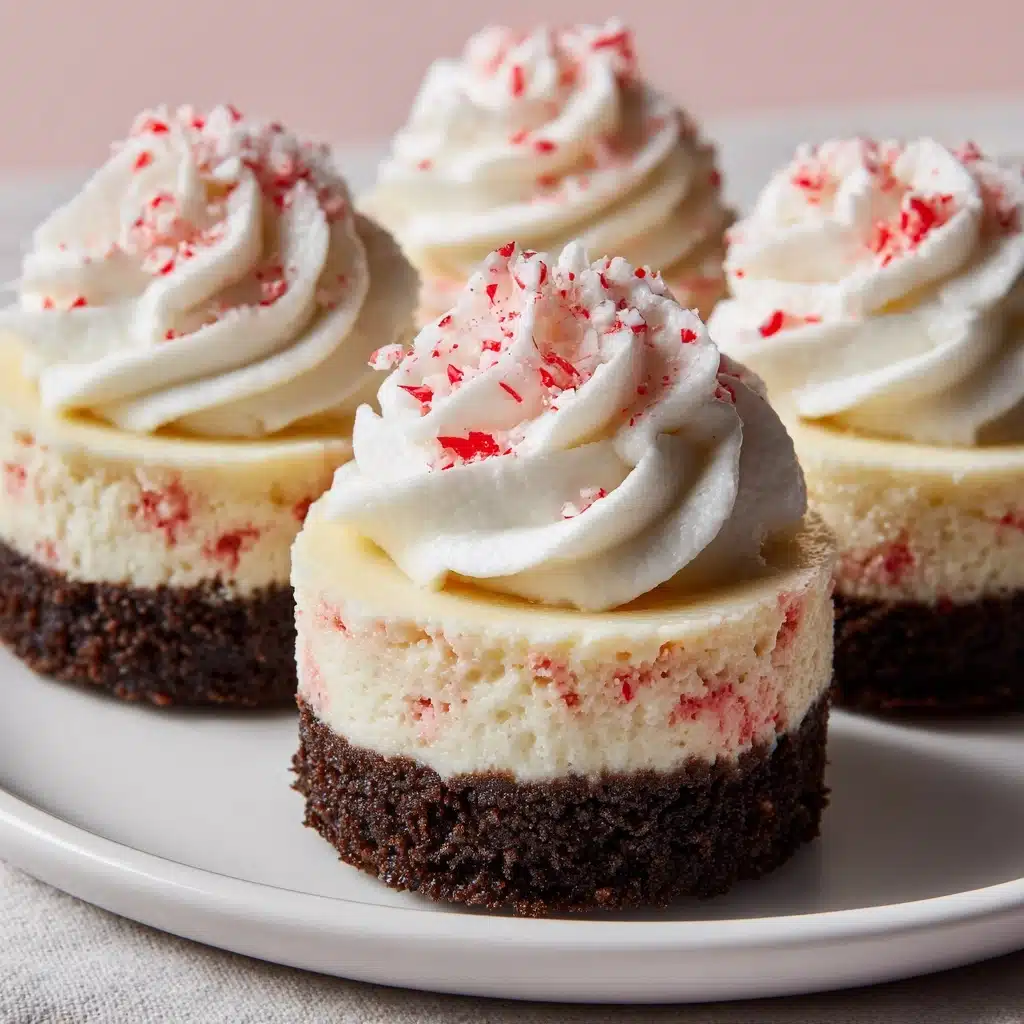
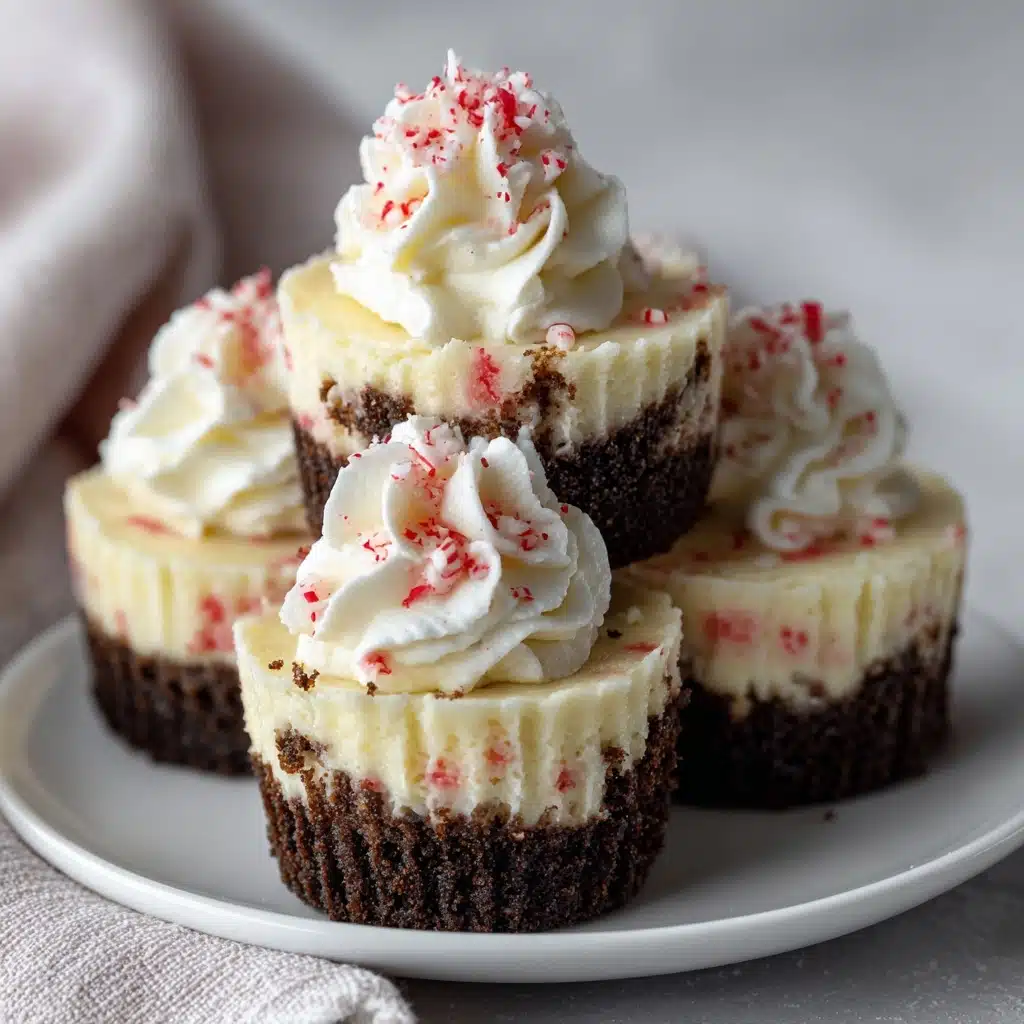
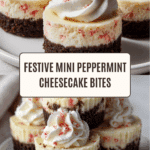
Say hello to your new festive favorite: this Peppermint Cheesecake Recipe is a cool, creamy marvel that brings wintery flair to your dessert table. Oreo cookie crusts cradle a luscious peppermint-swirled cheesecake, flecked with crunchy peppermint candy and crowned with whipped cream. Every bite is a holiday on a spoon, as rich chocolate meets velvety white chocolate and peppermint for a treat that’s as photogenic as it is decadent. Whether you’re hosting a holiday bash or treating yourself to a cozy night in, you’ll love how this no-bake cheesecake turns simple ingredients into a show-stopping delight.
Ingredients You’ll Need
What I adore most about this Peppermint Cheesecake Recipe is how each ingredient has a clear purpose—every component brings something special, from flavor to texture to that irresistible snowy look. All you need are a few everyday items, plus some candy magic, to whisk your kitchen straight into peppermint bliss.
- Oreo Cookies: These create a deeply chocolatey, crunchy base that contrasts beautifully with the creamy filling.
- Unsalted Butter: Melted butter binds the cookie crumbs, ensuring each crust holds its shape perfectly.
- Cold Heavy Whipping Cream: Whipped to stiff peaks, it gives the cheesecake luscious, airy lift.
- Cream Cheese: Softened ahead of time, it turns ultra-smooth and ensures a classic, tangy cheesecake foundation.
- White Chocolate Chips: Melted and stirred in, these add silkiness, extra sweetness, and subtle richness.
- Peppermint Extract: Just half a teaspoon infuses the filling with that unmistakable, bakery-fresh mint flavor.
- Chopped Andes Peppermint Crunch: These colorful bits speckle the cheesecake with bursts of minty crunch and holiday cheer.
- Whipped Cream (for topping): A frothy cloud on top, perfect for balancing the richness and adding a festive touch.
How to Make Peppermint Cheesecake Recipe
Step 1: Prep Your Muffin Tins
Start by lining two 12-cup muffin tins with cupcake liners. This move not only guarantees pretty, uniform mini cheesecakes but makes cleanup and serving a breeze. No one ever complained about dessert that comes with less mess!
Step 2: Create the Oreo Crust
Drop those Oreo cookies (cream and all) into a food processor and pulse until they become fine, uniform crumbs. Next, stir in the melted butter—this step is key, as it turns loose crumbs into a crust that holds together. Scoop about 1.5 tablespoons into each liner, then press firmly with the back of a spoon for a compact, delicious base. Each bite starts with a hit of chocolate crunch!
Step 3: Whip the Cream
Pour your cold heavy cream into a large bowl and beat it until stiff peaks form. Be patient: this step is crucial for that dreamy, mousse-like texture. Set your whipped cream aside; it’ll lighten up your cheesecake filling like a cloud.
Step 4: Blend the Cream Cheese
Now, beat your softened cream cheese until it’s completely smooth and creamy—no lumps allowed. This forms the heart of any great Peppermint Cheesecake Recipe, so don’t rush it! The smoother, the better.
Step 5: Melt the White Chocolate
Gently melt your white chocolate chips using a double boiler, or microwave them in 30-second bursts, stirring after each round. Once most chips have melted, a good stir will finish the job, leaving you with a glossy, pourable chocolate ready to enrich the filling.
Step 6: Combine the Cheesecake Filling
Stir the melted white chocolate right into the smooth cream cheese. Quickly, but gently, fold in the peppermint extract, chopped Andes Peppermint Crunch (save some for topping!), and your whipped cream. Aim for a silky, speckled mixture—don’t overmix, as you want to keep that light, airy feel intact.
Step 7: Fill the Cups
Fill each cupcake liner with about a 1/4 cup scoop of the cheesecake filling. A cookie scoop or measuring cup makes quick work of this. You want to cover the crust completely and create a smooth, even surface on top.
Step 8: Chill Thoroughly
Pop the trays into the fridge and let them chill for at least 4 hours (overnight is perfect if you can wait that long). This helps the Peppermint Cheesecake Recipe set up beautifully, making it firm but silky when you bite in.
Step 9: Finish with Toppings
Before serving, dollop each cheesecake with fluffy whipped cream and shower with extra chopped Andes Pepperming Crunch. This is your moment to go big with the holiday flair!
How to Serve Peppermint Cheesecake Recipe
Garnishes
For that classic winter wonderland vibe, top each mini cheesecake with a swirl of whipped cream and a generous handful of chopped Andes Peppermint Crunch. For even more sparkle, add crushed candy canes, white chocolate curls, or a sprig of fresh mint. The finishing touches elevate each Peppermint Cheesecake Recipe into a dessert that looks—and tastes—festive!
Side Dishes
Pair your cheesecakes with a mug of hot cocoa, a peppermint mocha, or even a glass of chilled coffee for a sophisticated contrast. Light fruit salads, sugared cranberries, or a scattering of fresh raspberries are also lovely alongside, adding color and a bright, juicy counterpoint.
Creative Ways to Present
Arrange your cheesecakes on a tiered dessert stand for a party, or plate each one on a swirl of chocolate sauce dusted with edible glitter. For gifting, pop them into pretty holiday cupcake boxes. At a holiday buffet, nestle them among sprigs of pine and twinkling fairy lights—surefire table showstoppers!
Make Ahead and Storage
Storing Leftovers
Leftovers (if you’re lucky enough to have any!) keep wonderfully. Store your Peppermint Cheesecake Recipe in an airtight container in the fridge for up to 5 days. The crust remains crisp, and the filling keeps its dreamy texture.
Freezing
To freeze, skip the whipped cream and peppermint topping initially. Place the mini cheesecakes (still in their liners) on a baking sheet and freeze until firm. Once set, transfer to a zip-top freezer bag. They’ll keep for up to three months—just thaw overnight in the refrigerator before topping and serving.
Reheating
No need to “reheat” these—just thaw and enjoy! If frozen, bring your cheesecakes to fridge temperature for the best flavor and texture. Always add fresh toppings after thawing for the prettiest presentation.
FAQs
Can I use other cookies for the crust?
Absolutely! While Oreos provide a classic chocolate punch, chocolate graham crackers, shortbread, or even gingersnaps work beautifully in this Peppermint Cheesecake Recipe. Just keep the proportions the same for the best result.
How do I prevent lumps in the cheesecake filling?
Start with room-temperature cream cheese and take time to beat it until perfectly smooth before adding other ingredients. Sifting the white chocolate helps if you notice any clumps, and always fold gently to preserve airiness.
Can I make one large cheesecake instead of minis?
You sure can! Press the crust into a 9-inch springform pan and add the filling as usual. Chill overnight for easy slicing. You may need a little more chill time, but the Peppermint Cheesecake Recipe scales up perfectly.
Is the peppermint flavor too strong?
Not at all—the amount of extract used is just enough for a cool, refreshing taste without overpowering the creamy richness. For a lighter touch, reduce the extract slightly, or for more punch, add a drop or two extra.
Can I make this dairy-free?
Yes! Use your favorite dairy-free cream cheese and coconut whipped topping, along with plant-based white chocolate. The result won’t be identical but will still deliver the trademark mint-chocolate cheer.
Final Thoughts
If you’re looking for a showstopping dessert that’s easy to love and sure to impress, this Peppermint Cheesecake Recipe is it. Every bit as delightful as it looks, with a make-ahead bonus, it’s a holiday winner you’ll reach for year after year. Give it a try—you might just start a new tradition!
PrintPeppermint Cheesecake Recipe
Indulge in the refreshing and creamy delight of Peppermint Cheesecake, a perfect blend of white chocolate, peppermint, and cream cheese that is sure to impress your taste buds.
- Prep Time: 30 minutes
- Total Time: 4 hours 30 minutes
- Yield: 12 mini cheesecakes 1x
- Category: Dessert
- Method: Baking
- Cuisine: American
- Diet: Vegetarian
Ingredients
Oreo Crust:
- 20 Oreo cookies
- 5 Tablespoons unsalted butter (melted)
Cheesecake Filling:
- 1 cup cold heavy whipping cream
- 2 packages cream cheese, softened (8 ounce each)
- 1 ½ cups white chocolate chips
- ½ teaspoon peppermint extract
- ½ cup chopped Andes Peppermint Crunch (plus additional for topping)
Topping:
- Whipped cream (for topping)
Instructions
- Prepare Oreo Crust: Line two 12-cup muffin tins with cupcake liners.
- Whip Cream: In a large mixing bowl, beat the whipping cream to stiff peaks.
- Prepare Cheesecake Filling: In a separate mixing bowl, beat the cream cheese until smooth.
- Melt White Chocolate: Melt white chocolate chips. Immediately stir the white chocolate into the cream cheese mixture. Gently fold in the peppermint extract, chopped peppermint candies, and whipped cream.
- Fill Cupcake Liners: Fill the cupcake liners with the cheesecake filling, using about ¼ cup of the cheesecake batter for each one.
- Chill: Refrigerate for at least 4 hours, or overnight.
- Top and Serve: Top with whipped cream and chopped Andes peppermints before serving.
In a food processor, pulse Oreos until they are fine crumbs. Stir in the melted butter. Fill each cupcake liner with 1 1/2 tablespoons of Oreo crumbs. Press firmly with the back of a spoon to pack in.
Nutrition
- Serving Size: 1 mini cheesecake
- Calories: 380
- Sugar: 23g
- Sodium: 250mg
- Fat: 28g
- Saturated Fat: 16g
- Unsaturated Fat: 8g
- Trans Fat: 0g
- Carbohydrates: 30g
- Fiber: 1g
- Protein: 5g
- Cholesterol: 65mg
Keywords: Peppermint Cheesecake, Mini Cheesecakes, Dessert Recipe
