
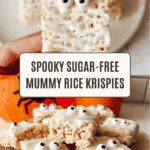
Mummy Rice Krispies for Halloween (Healthier, Sugar Free) Recipe
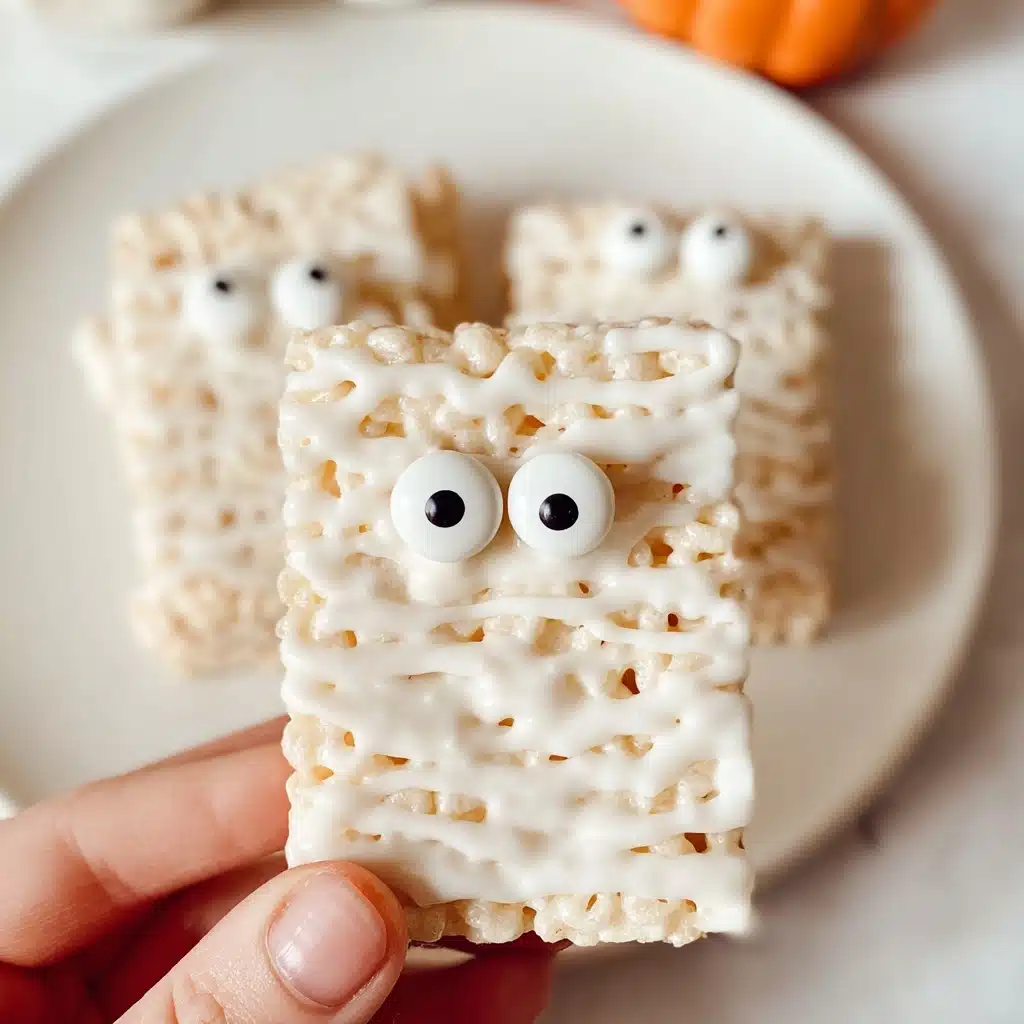
There’s nothing quite like delighting your ghoulish crew with a tray of Mummy Rice Krispies for Halloween (Healthier, Sugar Free). This showstopper treat is crunchy, marshmallowy, and decked out in white chocolate “bandages” with googly eyes, but guess what? It skips the sugar rush without losing any of the sweetness or fun. Perfect for parties, school treats, and sneaky late-night snacks, this recipe proves you don’t have to sacrifice health to conjure up something festive and delicious for Halloween. Let’s get ready to mix up the ultimate spooky snack that everyone can feel great about devouring!
Ingredients You’ll Need
This recipe comes together with just a handful of simple pantry staples, each playing a special role in creating that nostalgic snap, gooeyness, and playful flair. Quality ingredients really make these Mummy Rice Krispies for Halloween (Healthier, Sugar Free) shine, so don’t skimp on the good stuff!
- Butter (grass fed): Adds rich flavor and helps create the signature chewy texture in every bite.
- Sugar free marshmallows: Melts smoothly to bind everything together while keeping things naturally sweet and fluffy.
- Rice Krispies cereal (or sugar free rice puffs): The essential crunch factor—use sugar free puffs if you want to keep it extra wholesome.
- White chocolate chips (sugar free): For that classic mummy “wrap,” without the refined sugar.
- Edible eyeballs (or sugar free chocolate chips): The quirky detail that brings each mummy to life—kids and adults both love them!
How to Make Mummy Rice Krispies for Halloween (Healthier, Sugar Free)
Step 1: Melt the Butter and Marshmallows
Start with a large, heavy-bottomed pot over low heat. Add your grass-fed butter and let it melt completely, swirling occasionally. Next, toss in the sugar free marshmallows and stir patiently until they turn gooey and luxurious. Melted marshmallows are the secret glue holding our mummies together, so keep stirring until smooth, creamy, and luscious!
Step 2: Combine with Rice Krispies
Once your butter and marshmallow mixture is dreamy and uniform, take the pot off the heat. Immediately pour in your rice puffs or Rice Krispies cereal. Using a sturdy spatula, fold the cereal in gently but thoroughly, ensuring each piece is deliciously coated with the marshmallow mixture. This combo sets the stage for crispy, chewy bars that never feel sticky or soggy.
Step 3: Press and Set the Mixture
Line a deep baking dish with wax paper for easy unmolding. Scoop your cereal mixture in and press down firmly with a spatula to create a flat, even layer—this helps your mummies hold their shape once sliced. Pop the dish into the fridge for 5 to 10 minutes. Chilling makes the bars easier to cut and gets each treat wonderfully firm without getting hard.
Step 4: Melt the White Chocolate
Break out your sugar free white chocolate chips and a splash of coconut oil to help with drizzling. Melt together in a microwave-safe bowl or over gentle heat on the stove. Stir regularly until smooth and glossy—this is the “wrapping” for your adorable mummies!
Step 5: Slice and Decorate Your Mummies
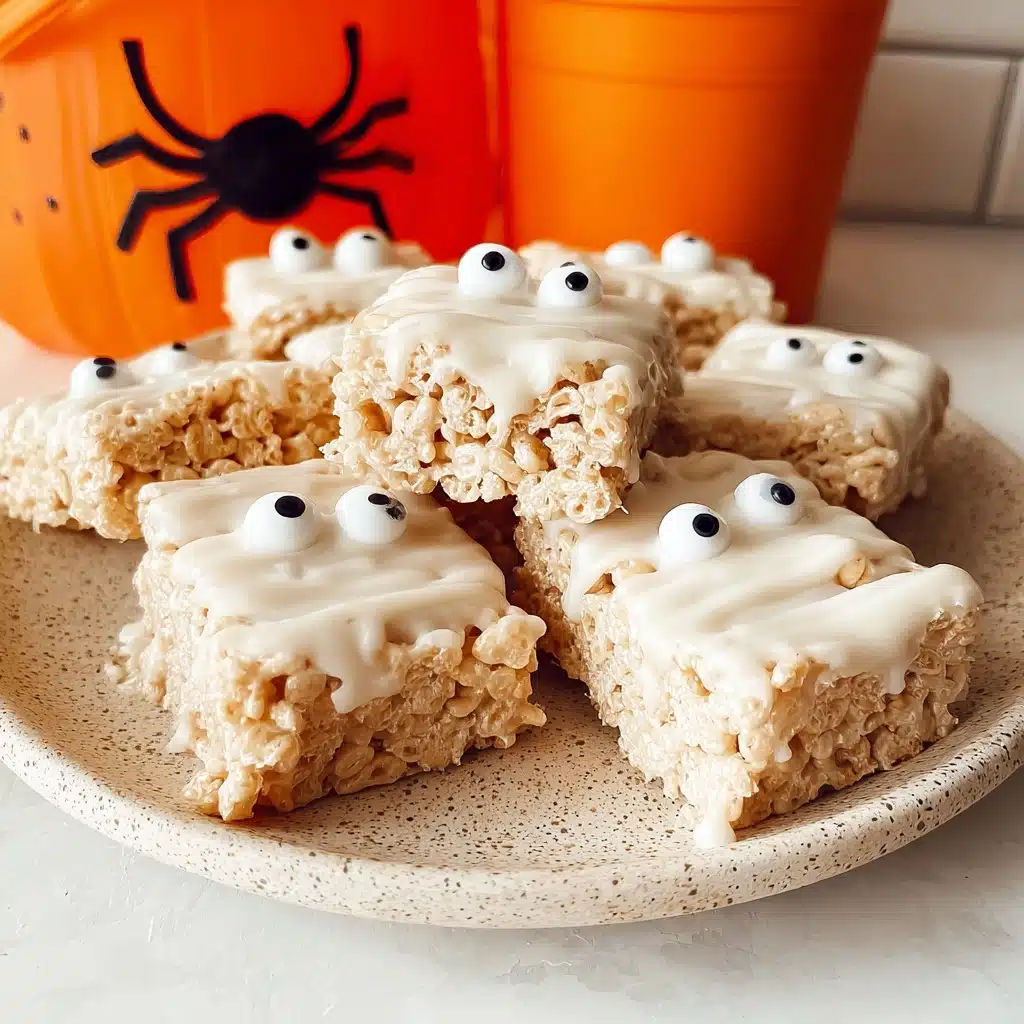
Remove your set rice krispie slab from the fridge and lift it out using the wax paper. Slice into even rectangles (aim for at least 10 for big mummies, or up to 20 mini ones). Now comes the fun part: drizzle the melted white chocolate in zigzags over each rectangle using a spoon or by piping through a corner-cut zip-top bag. Stick on two edible eyeballs while the chocolate is still soft, right near the top. Chill again for a few minutes to set the “bandages.” Now your Mummy Rice Krispies for Halloween (Healthier, Sugar Free) are ready to eat or show off!
How to Serve Mummy Rice Krispies for Halloween (Healthier, Sugar Free)
Garnishes
A little extra flair never hurts! Try a dusting of naturally colored sprinkles, an extra drizzle of dark chocolate, or even a few shredded coconut “cobwebs” for maximum Halloween effect. The more playful, the better, especially if you’re serving these to a crowd of eager trick-or-treaters or party guests.
Side Dishes
If you’re setting up a Halloween dessert table, Mummy Rice Krispies for Halloween (Healthier, Sugar Free) pair perfectly with fruit cups (think orange segments for “pumpkin” vibes), low-sugar hot cocoa, or popcorn tossed with cinnamon. It’s a sweet-and-savory combo that keeps everyone fueled for spooky adventures.
Creative Ways to Present
Turn your mummies into the life of the party! Arrange them on a haunted serving board, tuck them into individual treat bags with Halloween ribbon, or stand them upright in decorative cups. For classroom treats, wrap each mummy in wax paper and draw on a silly face. Let your creativity run wild—these are mummies, after all!
Make Ahead and Storage
Storing Leftovers
Place any leftover mummies in an airtight container and keep them at room temperature for up to 3 days. If your kitchen is particularly warm, stash them in the fridge to prevent the white chocolate from softening too much. Either way, these treats remain delightfully crisp and chewy!
Freezing
Want to bake ahead for your Halloween bash? Freeze undecorated bars by wrapping tightly in plastic wrap, then place in a freezer-safe bag or container for up to a month. Thaw overnight in the fridge, then add the white chocolate bandages and eyeballs fresh for the spookiest look and taste.
Reheating
Typically, these bars are best enjoyed chilled or at room temperature. If you’ve refrigerated or frozen them and want to soften them slightly, just let them sit out for 15–20 minutes before serving. There’s no need to microwave—this will help preserve their crunchy, fluffy texture.
FAQs
Can I make these completely dairy free?
Absolutely! Use a plant-based butter alternative and make sure your white chocolate chips are dairy-free. Sugar free marshmallows and vegan puffs fit right in, so your Mummy Rice Krispies for Halloween (Healthier, Sugar Free) will be just as delicious and inclusive.
What’s the best way to melt sugar free white chocolate?
The key to silky smooth white chocolate is gentle heat. Microwave in short bursts (15-20 seconds), stirring after each, or use a double boiler on the stove so the chocolate doesn’t seize. Adding a teaspoon of coconut oil helps create a perfect consistency for drizzling.
How long do these treats keep?
If stored in an airtight container, your mummies stay fresh for up to 3 days at room temperature or up to a week in the fridge. For best taste and texture, enjoy them within a couple of days of making.
Can kids help decorate these?
Getting the kiddos involved is one of the best parts! Let them drizzle the chocolate “bandages” or press on the eyeballs. It’s messy, creative, and so much fun, making the experience truly memorable—little hands make for extra spooky (and extra cute!) mummies.
Are there other healthy Rice Krispie treat variations for Halloween?
Definitely! Try adding unsweetened cocoa powder for chocolate mummies, using colorful sugar free sprinkles, or cutting into pumpkin or ghost shapes. The same formula works for countless holidays—just swap out colors and decorations for a new spin.
Final Thoughts
I can’t wait for you to whip up a batch of Mummy Rice Krispies for Halloween (Healthier, Sugar Free) and see the smiles (and maybe a few delightful gasps!) they bring to your festivities. Simple, cute, and so much fun to make and share, these are the kind of treats that become a cherished Halloween tradition. Happy haunting and happy snacking!
PrintMummy Rice Krispies for Halloween (Healthier, Sugar Free) Recipe
These Mummy Rice Krispies are a fun and healthier Halloween treat that are sugar-free and perfect for a spooky party or a festive dessert. Kids and adults alike will love these cute and delicious snacks!
- Prep Time: 15 minutes
- Cook Time: 10 minutes
- Total Time: 25 minutes
- Yield: 12 mummy rice krispies 1x
- Category: Dessert
- Method: Baking
- Cuisine: American
- Diet: Gluten Free
Ingredients
For the Rice Krispie Mixture:
- 1/4 cup grass-fed butter
- 6 cups sugar-free marshmallows
- 5 cups Rice Krispies cereal or sugar-free rice puffs
For Decorating:
- 8 oz sugar-free white chocolate chips
- 20 edible eyeballs or sugar-free chocolate chips for eyes
Instructions
- Make the Rice Krispie Mixture & Set: Begin by heating up a large pot with butter on low, then add in the marshmallows and stir until melty and smooth. Promptly remove the pot from the heat and stir in the rice puffs until well combined and completely coated. Transfer mixture to a deep baking dish lined with wax paper. Evenly spread out and press down using a spatula to avoid sticky fingers. Cool in the fridge for 5-10 minutes to harden.
- Top & Decorate The Mummies: Heat up the white chocolate and coconut oil and stir until smooth. Slice the rice krispies into even rectangles. Drizzle the white chocolate over each rice krispie by using a spoon (or a ziploc bag with a cut corner). Stick on the eyeballs towards the top to look like a mummy’s eyes before the chocolate hardens. To set quickly, place them back in the fridge and enjoy!
Notes
- For a spookier touch, you can add a few drops of black food coloring to the white chocolate for a darker effect.
- Store these Mummy Rice Krispies in an airtight container in the fridge for up to 3 days.
Nutrition
- Serving Size: 1 mummy rice krispie
- Calories: 180
- Sugar: 2g
- Sodium: 120mg
- Fat: 8g
- Saturated Fat: 5g
- Unsaturated Fat: 2g
- Trans Fat: 0g
- Carbohydrates: 25g
- Fiber: 1g
- Protein: 2g
- Cholesterol: 10mg
Keywords: Halloween, Rice Krispies, Mummy Treats, Sugar-Free, Halloween Dessert

