
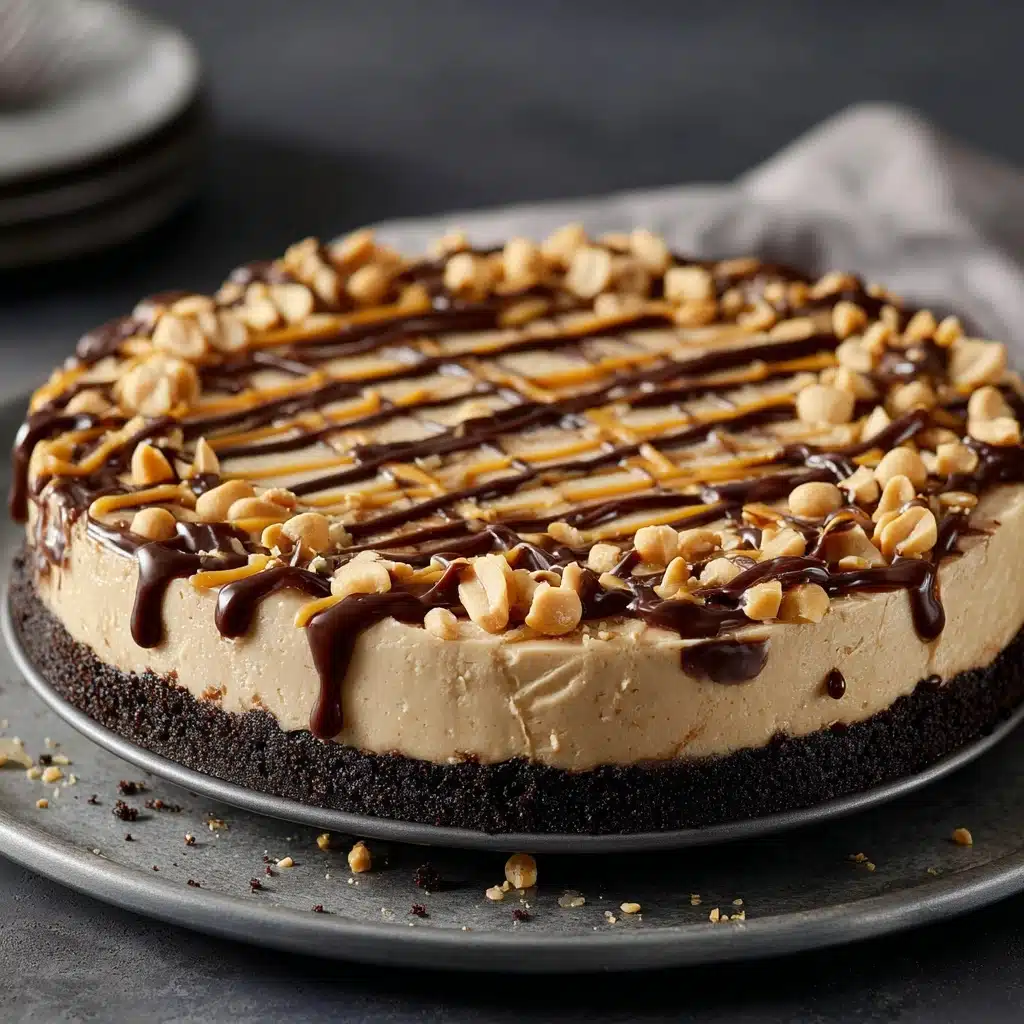
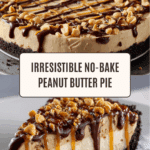
Easy Peanut Butter Pie Recipe
If you’re searching for a true crowd-pleaser that brings together sweet, salty, and creamy flavors in every single bite, this Easy Peanut Butter Pie Recipe is about to become your new dessert obsession. A crushed Oreo cookie crust anchors a silky-smooth peanut butter and cream cheese filling, crowned with crunchy peanuts and luscious drizzles of chocolate and butterscotch syrups (if you please). Best of all, there’s no baking required, and each bite tastes like you put in hours — when really, it’s an easy-as-pie treat you can throw together anytime the craving strikes!
Ingredients You’ll Need
Every ingredient in this Easy Peanut Butter Pie Recipe serves a purpose: they provide rich flavor, airy texture, and that craveable combo of chocolate and peanut butter everyone adores. With only a few simple staples, you’ll create something truly special — so let’s break down what makes each element shine!
- Oreos (24 regular): Crushed into crumbs, these cookies form the deep chocolatey base of the pie.
- Unsalted Butter (5 tablespoons, melted): Binds the Oreo crumbs into a sturdy yet tender crust.
- Whipping Cream (1 cup): Whipped until fluffy, it gives the filling a light, airy texture that melts in your mouth.
- Powdered Sugar (2 tablespoons + ½ cup): Sweetens both the whipped cream and the peanut butter mixture just enough, without being overwhelming.
- Cream Cheese (8 ounces, softened): Adds tang and stability to the luscious filling; make sure it’s at room temp for smooth blending.
- Creamy Peanut Butter (½ cup): The star of the show! Provides that classic, rich peanut buttery goodness we all crave.
- Vanilla Extract (1 teaspoon): Heightens the flavors and adds a fragrant, bakery-style aroma.
- Chopped Peanuts (½ cup): Give a crunchy, salty finish for contrast in every forkful.
- Chocolate Syrup (¼ cup, optional): Drizzle for an extra layer of chocolate decadence on top.
- Butterscotch Syrup (¼ cup, optional): Pairs perfectly with peanut butter, offering a rich, caramely twist.
How to Make Easy Peanut Butter Pie Recipe
Step 1: Prepare the Oreo Crust
Start by greasing your 9-inch pie plate to make serving a breeze later. Crush the Oreos in a food processor or blender until you have fine, even crumbs. Mix these crumbs thoroughly with the melted butter in a small bowl, then press the mixture firmly into the bottom and up the sides of your pie plate. The crust should be even, with no thick or thin spots for best results. Chill in the refrigerator for at least 30 minutes — this allows the crust to firm up and hold its shape for slicing.
Step 2: Whip the Cream
Pour the whipping cream into a mixing bowl and add the first 2 tablespoons of powdered sugar. Using your hand or stand mixer, beat on medium speed until stiff peaks form. This takes just a few minutes and is crucial for a light, fluffy filling that won’t weigh down your pie. Set the whipped cream aside — but don’t wander far; it’ll be folded in soon!
Step 3: Make the Peanut Butter Filling
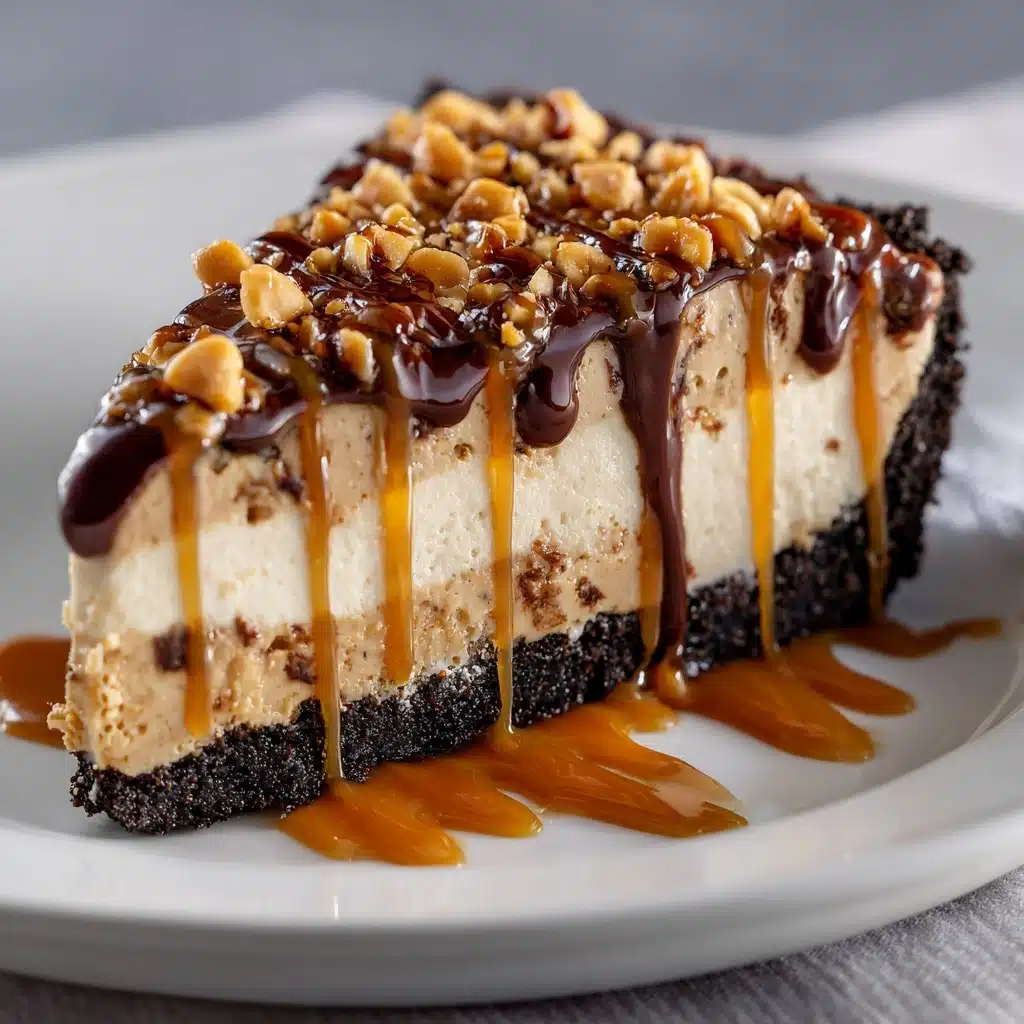
In another mixing bowl, beat the softened cream cheese until silky smooth with no lumps. Next, add the peanut butter, remaining ½ cup of powdered sugar, and vanilla extract. Beat until the mixture is creamy, thick, and evenly combined. Scrape down the sides — you don’t want any hidden streaks! Now, using a spatula, gently fold in the whipped cream you set aside. Folding (rather than stirring) keeps the filling ultra-light and mousse-like. Once blended, spoon it all into your cooled Oreo crust, smoothing the top as you go.
Step 4: Finish and Chill
Sprinkle chopped peanuts liberally over the top for a hit of crunch and a pretty finish. If you’re feeling extra indulgent, drizzle chocolate and butterscotch syrup across the surface in zigzags or swirls. Chill the finished pie for at least 2 hours in the refrigerator — longer if you want a firmer texture (or freeze it for an ice cream-style treat!). Your Easy Peanut Butter Pie Recipe is now ready to serve and swoon over!
How to Serve Easy Peanut Butter Pie Recipe
Garnishes
There are endless ways to dress up your Easy Peanut Butter Pie Recipe! Aside from the classic crushed peanuts, consider extra cookie crumbs, a dusting of cocoa powder, or playful dollops of whipped cream. The optional chocolate and butterscotch drizzles are always a hit, so don’t be shy with those sauces. Fresh berries or a few peanut butter cups chopped on top turn this pie into pure celebration territory.
Side Dishes
This dessert is rich, so pair each creamy slice with something refreshing — think a fresh fruit salad or a scoop of tangy raspberry sorbet. For a special occasion, a glass of cold milk, hot coffee, or even a little espresso makes an irresistible counterpart to the decadent pie.
Creative Ways to Present
The Easy Peanut Butter Pie Recipe looks smashing served family-style, but you can go the extra mile by slicing and plating each piece with a drizzle of syrup and a sprinkle of nuts. For individual portions at parties, make the pie in mini tart pans or mason jars. Layered parfait-style with Oreo crumbs, filling, and toppings, this dessert becomes not just a treat for the taste buds but total eye candy, too!
Make Ahead and Storage
Storing Leftovers
Cover leftover pie with plastic wrap or airtight foil, and store in the fridge for up to 4 days. The filling stays creamy, and the crust remains delightfully crisp — just be sure to chill promptly after serving to keep everything fresh. Slices hold their shape best if served cold from the refrigerator.
Freezing
You can absolutely freeze this pie! Once the Easy Peanut Butter Pie Recipe has set in the fridge, tightly wrap the entire pie or individual slices, and store them in the freezer for up to a month. Serve straight from the freezer for a frozen-treat version, or let it soften in the fridge for a creamy, dreamy experience. Perfect for make-ahead entertaining or emergency dessert cravings!
Reheating
No reheating necessary (or recommended) for this recipe. Enjoy it straight from the fridge or freezer. If you want a slightly softer filling, let a refrigerated or frozen slice rest at room temperature for 10-15 minutes before serving. The textures and flavors really sing when just a bit chilled.
FAQs
Can I use crunchy peanut butter instead of creamy?
Yes, swapping in crunchy peanut butter gives the filling added texture and a subtle nutty bite. Just make sure your peanut butter is well-mixed before measuring, and you may want to use a few extra tablespoons if it’s especially thick.
Can I make the crust with gluten-free cookies?
Absolutely! Substitute your favorite gluten-free chocolate sandwich cookies for the Oreos in this Easy Peanut Butter Pie Recipe and proceed as directed. The end result will still be decadent and delicious, just gluten-free!
How far ahead can I make this pie?
This pie is perfect for making the night before a party or event. In fact, making it a day ahead allows the flavors to blend and the filling to fully set — you can also freeze it for longer storage and thaw in the fridge before serving.
What can I use instead of cream cheese?
If needed, mascarpone cheese makes a lovely substitute for cream cheese, offering a milder flavor and similar creamy consistency. Greek yogurt (drained) can work in a pinch, but will yield a tangier flavor and slightly softer texture.
How do I keep the crust from sticking?
Be sure to grease your pie plate thoroughly before pressing in the Oreo crumbs, and chill the crust until very firm before adding the filling. Running a sharp, thin knife around the edges before slicing also helps each piece come out cleanly.
Final Thoughts
If you love quick, showstopping desserts, this Easy Peanut Butter Pie Recipe is the one to try next! Every layer delivers a perfect balance of flavors and textures, and it’s so simple you’ll want to make it again and again. Treat yourself and your loved ones to a slice — I promise, this creamy, dreamy pie will be the talk of your table!
PrintEasy Peanut Butter Pie Recipe

Indulge in the creamy, nutty goodness of this Easy Peanut Butter Pie. With a rich Oreo crust, a luscious peanut butter filling, and optional chocolate and butterscotch drizzles, this pie is a decadent treat for any occasion.
- Prep Time: 20 minutes
- Cook Time: 0 minutes
- Total Time: 2 hours 50 minutes
- Yield: 1 9-inch pie 1x
- Category: Dessert
- Method: Baking, No-Bake
- Cuisine: American
- Diet: Vegetarian
Ingredients
Oreo Crust:
- 24 Oreos (regular not double stuffed)
- 5 tablespoons unsalted butter, melted
Filling:
- 1 cup whipping cream
- 2 tablespoons powdered sugar
- 8 ounces cream cheese, softened
- ½ cup creamy peanut butter
- ½ cup powdered sugar
- 1 teaspoon vanilla extract
Topping:
- ½ cup chopped peanuts
- ¼ cup chocolate syrup (optional)
- ¼ cup butterscotch syrup (optional)
Instructions
- Prepare the Oreo Crust: Grease a 9-inch pie plate. Crush Oreo cookies in a food processor or blender. Mix cookie crumbs with melted butter. Press into the pie pan and refrigerate for 30 minutes.
- Whip the Cream: Using a hand or stand mixer, beat whipping cream and 2 tablespoons powdered sugar until stiff peaks form. Set aside.
- Make the Filling: Beat cream cheese until smooth. Add peanut butter, 1/2 cup powdered sugar, and vanilla extract; beat until creamy. Fold in the whipped cream and spread into the pie crust.
- Add Toppings: Sprinkle chopped peanuts on top. Optionally, drizzle with chocolate and butterscotch syrup.
- Chill and Serve: Refrigerate for at least 2 hours or freeze before serving.
Notes
- This pie can be enjoyed both chilled and frozen.
- Adjust sweetness by adding more or less powdered sugar according to taste.
Nutrition
- Serving Size: 1 slice
- Calories: 380
- Sugar: 20g
- Sodium: 280mg
- Fat: 28g
- Saturated Fat: 13g
- Unsaturated Fat: 12g
- Trans Fat: 0g
- Carbohydrates: 30g
- Fiber: 2g
- Protein: 7g
- Cholesterol: 55mg
Keywords: Peanut Butter Pie, No-Bake Pie, Dessert Recipe
