
Baked Apple Cinnamon Cheesecake Recipe
Introduction
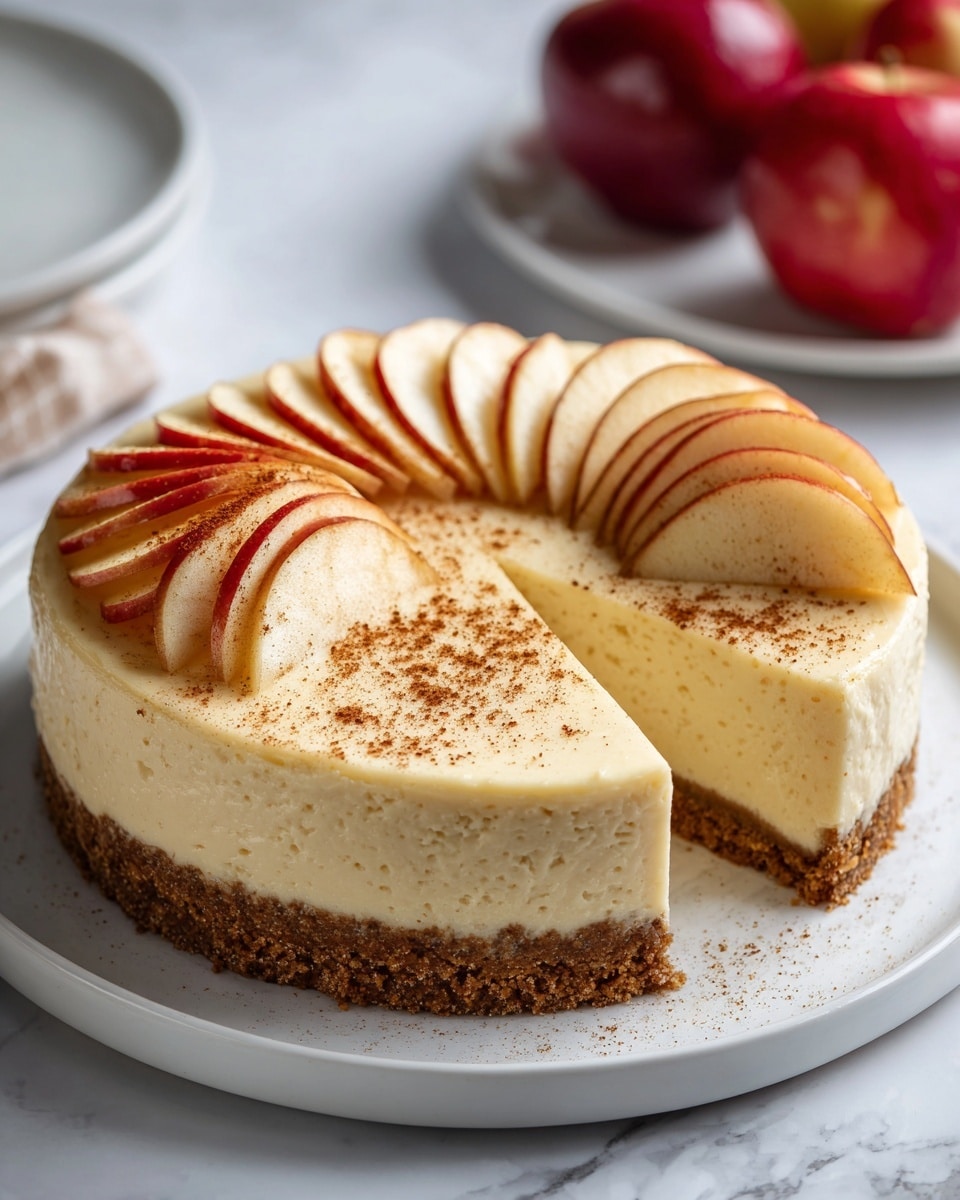
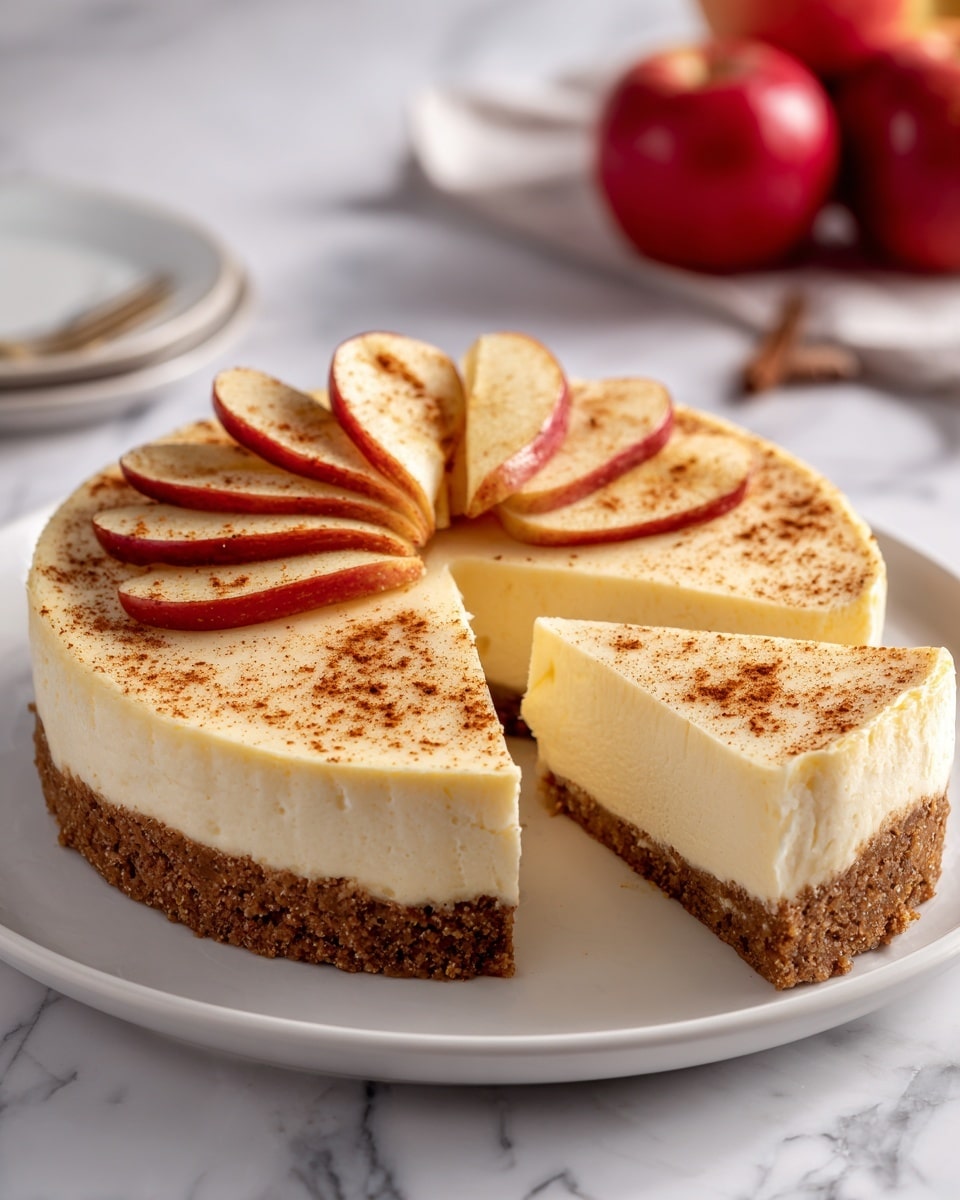
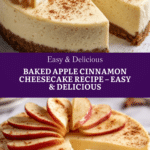
This Baked Apple Cinnamon Cheesecake is a luscious dessert that combines creamy cheesecake with warm, spiced apples on top. It’s perfect for cozy gatherings or a special treat when you crave something comforting and elegant.
Ingredients
- 1 1/2 cups graham cracker crumbs
- 1/4 cup granulated sugar
- 1/2 cup unsalted butter, melted
- 16 ounces cream cheese, softened
- 1 cup granulated sugar
- 3 large eggs
- 1 teaspoon vanilla extract
- 1 teaspoon ground cinnamon
- 1/4 teaspoon salt
- 1 cup sour cream
- 2 medium apples, peeled, cored, and thinly sliced
- 1 tablespoon lemon juice
- 1/4 cup brown sugar
- 1 teaspoon ground cinnamon
- 1 tablespoon unsalted butter, melted
Instructions
- Step 1: Preheat your oven to 325°F (160°C). Grease a 9-inch springform pan.
- Step 2: In a medium bowl, combine the graham cracker crumbs, granulated sugar, and melted butter. Mix until well combined.
- Step 3: Press the crumb mixture firmly into the bottom of the prepared pan to form an even layer. Bake for 10 minutes, then remove and let cool.
- Step 4: In a large bowl, beat the softened cream cheese with an electric mixer until smooth and creamy.
- Step 5: Gradually add the granulated sugar, mixing well. Add the eggs one at a time, beating thoroughly after each addition.
- Step 6: Mix in vanilla extract, ground cinnamon, and salt. Stir in the sour cream until smooth.
- Step 7: Pour the cheesecake filling over the cooled crust, smoothing the top with a spatula.
- Step 8: Toss the sliced apples with lemon juice, brown sugar, ground cinnamon, and melted butter in a bowl until evenly coated.
- Step 9: Arrange the apple mixture evenly over the cheesecake filling.
- Step 10: Bake for 60–70 minutes, until the center is set but slightly jiggly.
- Step 11: Turn off the oven and leave the cheesecake inside for 1 hour to cool gradually.
- Step 12: Remove the cheesecake and let it cool to room temperature.
- Step 13: Refrigerate for at least 4 hours or overnight until fully set.
- Step 14: Remove the sides of the springform pan, slice, and serve chilled.
Tips & Variations
- Use tart apples like Granny Smith for a nice balance of sweetness and tang.
- For extra flavor, add a pinch of nutmeg or allspice to the apple topping.
- Swap graham crackers for digestive biscuits if preferred.
- Make mini cheesecakes in muffin tins for individual portions.
Storage
Store leftover cheesecake covered in the refrigerator for up to 4 days. To reheat, let it sit at room temperature for 10 minutes. The cheesecake is best enjoyed chilled to preserve its creamy texture.
How to Serve
Serve this delicious recipe with your favorite sides.
FAQs
Can I use other types of apples for the topping?
Yes, you can use any apples you like, but firmer and slightly tart varieties such as Granny Smith or Honeycrisp work best to hold their shape and balance the sweetness.
Do I need a springform pan for this recipe?
While a springform pan makes it easier to remove the cheesecake without damaging it, you can use a regular cake pan and line it with parchment paper for easier removal.
PrintBaked Apple Cinnamon Cheesecake Recipe

This Baked Apple Cinnamon Cheesecake is a delightful dessert combining a rich, creamy cheesecake with a spiced apple topping. Featuring a buttery graham cracker crust and a smooth cinnamon-infused filling, it is baked to perfection and topped with tender, sweetened apples. This comforting fall-inspired dessert is perfect for special occasions or cozy nights at home.
- Prep Time: 30 minutes
- Cook Time: 1 hour
- Total Time: 1 hour 30 minutes
- Yield: 8 servings 1x
- Category: Dessert
- Method: Baking
- Cuisine: American
- Diet: Vegetarian
Ingredients
For the Crust:
- 1 1/2 cups graham cracker crumbs
- 1/4 cup granulated sugar
- 1/2 cup unsalted butter, melted
For the Cheesecake Filling:
- 16 ounces cream cheese, softened
- 1 cup granulated sugar
- 3 large eggs
- 1 teaspoon vanilla extract
- 1 teaspoon ground cinnamon
- 1/4 teaspoon salt
- 1 cup sour cream
For the Apple Topping:
- 2 medium apples, peeled, cored, and thinly sliced
- 1 tablespoon lemon juice
- 1/4 cup brown sugar
- 1 teaspoon ground cinnamon
- 1 tablespoon unsalted butter, melted
Instructions
- Preheat Oven and Prepare Pan: Preheat your oven to 325°F (160°C). Grease a 9-inch springform pan to prevent sticking.
- Make the Crust Mixture: In a medium bowl, combine the graham cracker crumbs, granulated sugar, and melted butter. Stir until the mixture is evenly combined and crumbly.
- Form and Bake the Crust: Press the crumb mixture firmly into the bottom of the prepared springform pan to create an even layer. Bake the crust for 10 minutes, then remove from the oven and allow it to cool.
- Beat the Cream Cheese: In a large bowl, use an electric mixer to beat the softened cream cheese until it’s smooth and creamy without lumps.
- Add Sugar and Eggs: Gradually add 1 cup granulated sugar while continuing to mix. Add the eggs one at a time, beating well after each addition to incorporate fully.
- Mix Flavorings and Sour Cream: Stir in the vanilla extract, ground cinnamon, and salt until evenly mixed. Then add the sour cream and blend until the filling is smooth.
- Pour Filling Over Crust: Pour the cheesecake filling over the cooled crust in the springform pan. Use a spatula to smooth the surface evenly.
- Prepare Apple Topping: In a bowl, toss the thinly sliced apples with lemon juice, brown sugar, ground cinnamon, and melted butter until they are well coated.
- Arrange Apples on Filling: Evenly spread the apple mixture over the cheesecake filling, gently pressing to create a uniform layer.
- Bake the Cheesecake: Bake in the preheated oven for 60 to 70 minutes, until the center is set yet retains a slight jiggle when shaken gently.
- Cool Gradually in Oven: Turn off the oven and leave the cheesecake inside for 1 hour to cool gradually, preventing cracks.
- Cool to Room Temperature: Remove the cheesecake from the oven and allow it to cool completely at room temperature.
- Chill to Set: Refrigerate the cheesecake for at least 4 hours or preferably overnight to let it fully set and develop flavor.
- Serve: Remove the sides of the springform pan carefully, slice the cheesecake, and serve chilled for the best texture and taste.
Notes
- Use room temperature cream cheese to avoid lumps in the cheesecake filling.
- Ensure apples are thinly sliced for even cooking and better texture on top.
- Gradually cooling the cheesecake in the oven helps prevent cracks on the surface.
- Chilling overnight improves the texture and flavor depth of the cheesecake.
- This recipe can be made a day ahead and stored in the refrigerator.
Keywords: Baked cheesecake, apple cinnamon cheesecake, fall dessert, creamy cheesecake, graham cracker crust, apple topping, baked desserts

