
Old-Fashioned Pink Jelly Cakes Recipe
Introduction
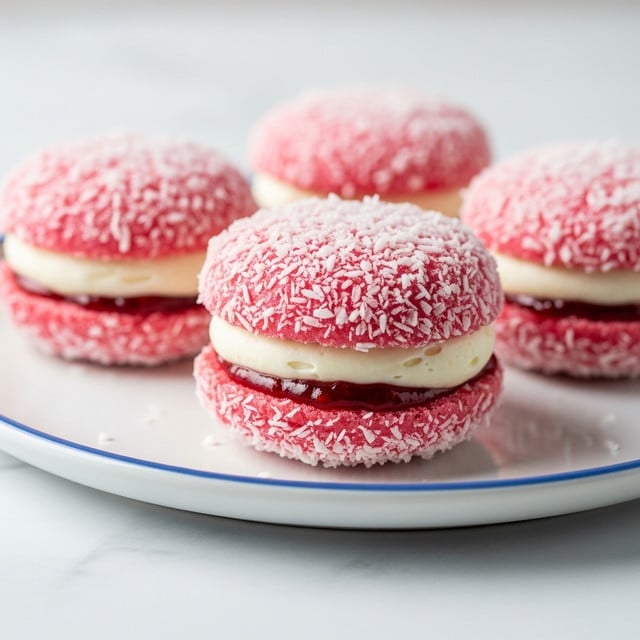
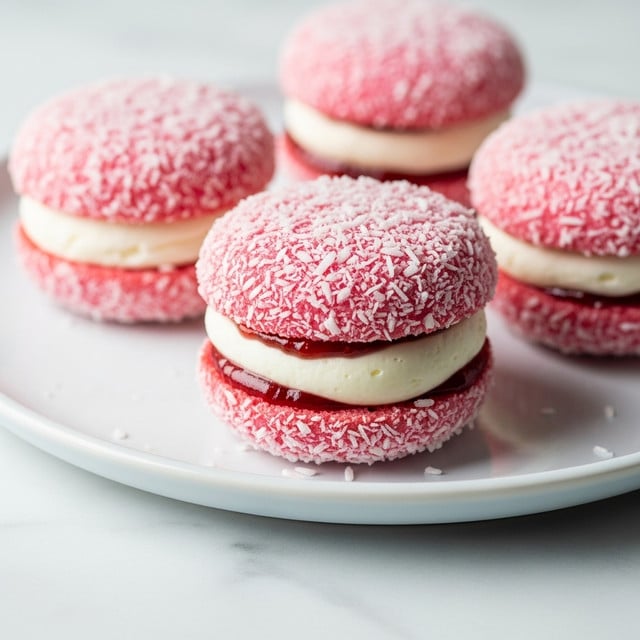
Old-Fashioned Pink Jelly Cakes are a nostalgic treat that combines soft sponge cakes with sweet strawberry jelly, coconut, and whipped cream. Perfect for afternoon tea or a light dessert, these delightful cakes offer a charming mix of textures and flavors.
Ingredients
- 80g butter, softened
- 1/2 cup (110g) caster sugar
- 1 tsp vanilla extract
- 1 egg
- 2/3 cup (160g) milk
- 1 cup (130g) self-raising flour, sifted
- 85g packet strawberry jelly crystals
- 1 cup (240g) boiling water
- 1 cup (240g) cold water
- 3 1/2 cups (280g) desiccated coconut
- 1 cup (240g) whipped cream
Instructions
- Step 1: Preheat the oven to 175°C (fan-forced) and lightly grease two 12-hole patty-pan tins.
- Step 2: In a large bowl, cream together the softened butter, caster sugar, and vanilla extract until pale and fluffy. Beat in the egg until fully incorporated.
- Step 3: Gently fold in the milk and sifted self-raising flour alternately in two batches: add half the milk, then half the flour, then the remaining milk followed by the remaining flour.
- Step 4: Spoon the batter into the patty-pan holes, filling each just below the top edge.
- Step 5: Bake for 15 to 18 minutes, or until the cakes are lightly golden and a skewer inserted into the center comes out clean.
- Step 6: Let the cakes cool in the tins for 5 minutes before transferring them to a wire rack to cool completely.
- Step 7: Prepare the jelly by dissolving the strawberry jelly crystals in boiling water, then stir in the cold water. Refrigerate until the jelly is partially set, about 1 to 2 hours.
- Step 8: Using a slotted spoon, dip each cooled cake into the partially set jelly, then roll the jelly-coated cake in the desiccated coconut.
- Step 9: Spread whipped cream onto one half of a cake and sandwich it together with another cake.
- Step 10: Chill the assembled cakes in the refrigerator for 30 minutes to allow the jelly to set before serving.
Tips & Variations
- For a more intense strawberry flavor, use fresh strawberry puree mixed into the whipped cream.
- Try substituting the desiccated coconut with finely chopped nuts or crushed freeze-dried strawberries for added texture.
- If jelly is too soft to coat the cakes, let it set a little longer in the fridge before dipping.
- Make it easier to sandwich by chilling the whipped cream slightly to help it hold its shape better.
Storage
Store the jelly cakes in an airtight container in the refrigerator for up to 2 days for best freshness. They may soften over time as the jelly and cream interact with the sponge. Reheat is not recommended; serve chilled for the best texture and flavor.
How to Serve
Serve this delicious recipe with your favorite sides.
FAQs
Can I use a different flavor of jelly?
Yes, you can substitute strawberry jelly with any other fruit-flavored jelly crystals you prefer. Just be sure to adjust the color and complementary flavors accordingly.
Can I prepare the cakes ahead of time?
You can bake the sponge cakes a day in advance and store them in an airtight container. Assemble with jelly, coconut, and cream just before serving for the freshest texture.
PrintOld-Fashioned Pink Jelly Cakes Recipe

Old-Fashioned Pink Jelly Cakes are delightful sponge cakes coated in fruity strawberry jelly and desiccated coconut, filled with luscious whipped cream. These nostalgic treats combine soft, fluffy texture with a sweet, vibrant jelly coating, perfect for parties or afternoon tea.
- Prep Time: 30 minutes
- Cook Time: 18 minutes
- Total Time: 1 hour 45 minutes
- Yield: 18 servings 1x
- Category: Dessert
- Method: Baking
- Cuisine: Australian
Ingredients
Cake Batter
- 80g butter, softened
- 1/2 cup (110g) caster sugar
- 1 tsp vanilla extract
- 1 egg
- 2/3 cup (160g) milk
- 1 cup (130g) self-raising flour, sifted
Jelly Coating
- 85g packet strawberry jelly crystals
- 1 cup (240g) boiling water
- 1 cup (240g) cold water
- 3 1/2 cups (280g) desiccated coconut
Filling
- 1 cup (240g) whipped cream
Instructions
- Preheat Oven and Prepare Pans: Preheat the oven to 175°C (fan-forced). Lightly grease two 12-hole patty-pan tins to prevent sticking and ensure even baking.
- Cream Butter, Sugar, and Vanilla: In a large mixing bowl, beat the softened butter, caster sugar, and vanilla extract together until the mixture is pale and fluffy, which helps create a light cake texture.
- Add Egg: Beat in the egg thoroughly until fully incorporated into the creamed mixture, ensuring smooth batter consistency.
- Fold in Milk and Flour: Alternately fold in the milk and sifted self-raising flour in two batches — half the milk, half the flour, then repeat — gently mixing to maintain airiness in the batter.
- Fill Patty-Pan Tins: Spoon the batter evenly into the prepared patty-pan holes, filling each just below the top to allow room for rising during baking.
- Bake: Place the tins in the oven and bake for 15 to 18 minutes or until the cakes are lightly golden and a skewer inserted into the center comes out clean, indicating doneness.
- Cool Cakes: Let the cakes cool in the tins for 5 minutes to slightly firm up, then transfer them onto a wire rack to cool completely, which helps maintain the cakes’ shape.
- Prepare Strawberry Jelly: Dissolve the strawberry jelly crystals in boiling water, stir in cold water, and then refrigerate the mixture until it is partially set, about 1 to 2 hours, for a sticky but not fully firm consistency.
- Coat Cakes with Jelly and Coconut: Using a slotted spoon, dip each cooled cake into the partially set jelly to coat evenly, then roll the jelly-coated cakes in desiccated coconut, covering them thoroughly.
- Fill and Sandwich Cakes: Spoon whipped cream onto one half of a jelly-coated cake and then sandwich it together with another cake, creating a delightful creamy filling.
- Chill Before Serving: Place the assembled jelly cakes in the fridge and chill for 30 minutes to let the jelly set firmly, ensuring the cakes hold together and the flavors meld.
Notes
- Ensure the jelly is partially set, not fully solid, before dipping the cakes for the best coating texture.
- Use room temperature butter and eggs to achieve a smooth, well-emulsified batter.
- Self-raising flour is key for the light texture; if unavailable, use all-purpose flour with baking powder as a substitute.
- Refrigerate the assembled cakes to allow the jelly to harden slightly for easier handling and serving.
- These cakes can be stored in an airtight container in the fridge for up to 2 days for optimal freshness.
Keywords: Pink jelly cakes, strawberry jelly dessert, coconut jelly cakes, whipped cream filled cakes, old-fashioned desserts


