
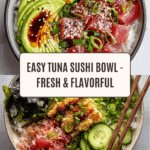
Tuna Sushi Bowl Recipe
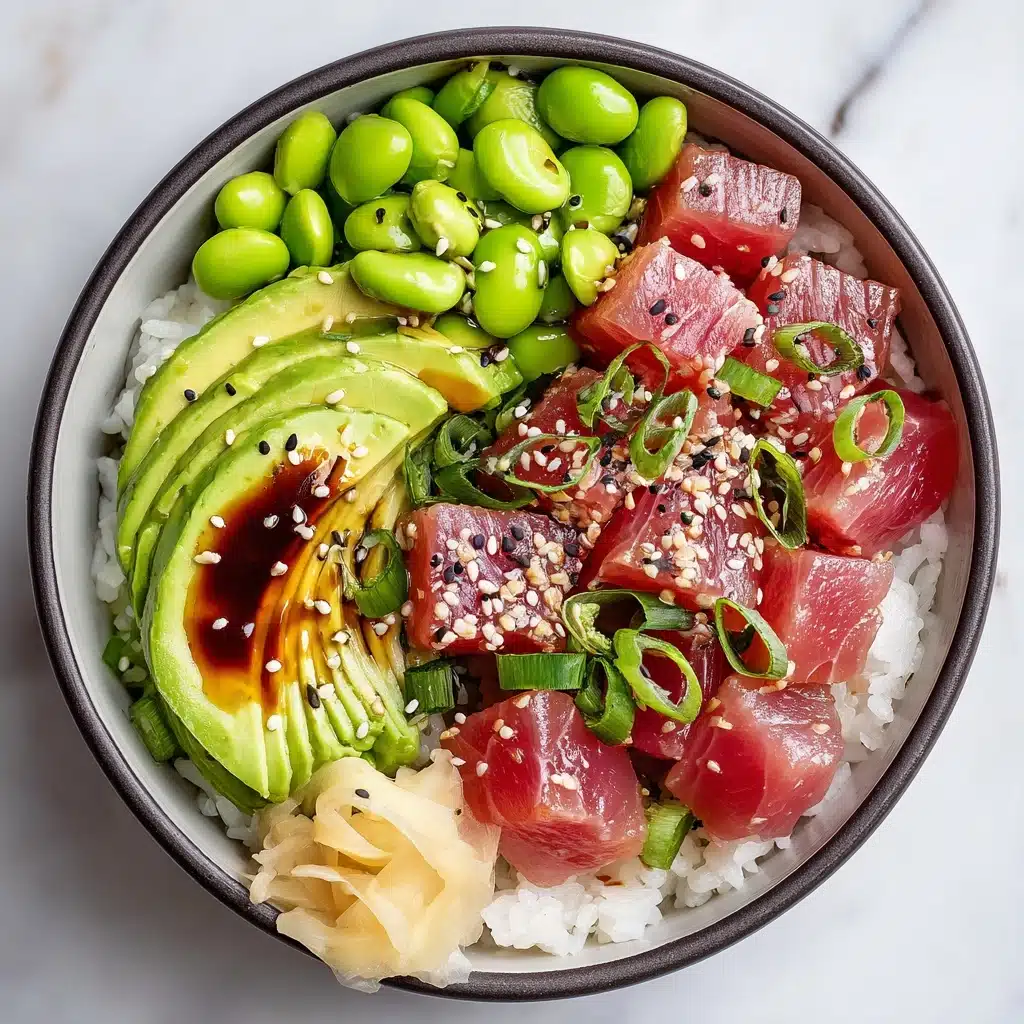
If you’re looking for a vibrant, fresh, and utterly satisfying dish that turns everyday ingredients into something special, the Tuna Sushi Bowl is about to become your new obsession. This gorgeous bowl packs all the flavors of your favorite sushi roll—tender tuna, creamy avocado, zippy pickled ginger, and bite-sized edamame—on a bed of perfect sushi rice, doused in savory soy and sesame. It’s healthy, lightning-fast, and as fun to eat as it is to assemble—truly the best way to satisfy those sushi cravings at home, no special rolling skills required!
Ingredients You’ll Need
What I love most about the Tuna Sushi Bowl is how each humble ingredient shines on its own, coming together in a rainbow of texture and flavor. Even better, every component works double-time: they’re simple to prepare while adding depth, creaminess, crunch, or that pop of savory you’re craving.
- Sushi Rice: This short-grain rice is essential for its sticky texture and sweet, subtle flavor that anchors every bowl.
- Fresh sushi grade or cooked tuna: Whether you go raw or opt for cooked, high-quality tuna is the star, offering protein and irresistible umami.
- Soy Sauce: Just one tablespoon brings big, salty depth that elevates the tuna and ties the whole bowl together.
- Sesame Oil: Just a teaspoon adds aromatic nuttiness and that classic sushi bar shine.
- Avocado: Creamy, dreamy, and buttery, avocado offers luxurious richness that balances the other flavors.
- Edamame (shelled): These little green gems bring crunch, color, and plant-based protein. Look for them in the freezer aisle!
- Pickled Ginger: Tangy and slightly sweet, this zingy condiment cleanses your palate between every delicious bite.
How to Make Tuna Sushi Bowl
Step 1: Prepare the Sushi Rice
Start by cooking the sushi rice according to the package instructions. Take your time here—rinsing the rice before cooking helps it become fluffy and perfectly sticky. Once cooked, fluff it gently with a fork and let it cool slightly. The rice should be warm, not hot, when assembling your bowl; this helps the toppings sit beautifully and keeps the texture just right.
Step 2: Marinate the Tuna
While your rice is cooling, dice your fresh sushi grade or cooked tuna into bite-sized cubes. Place them in a bowl and drizzle with soy sauce and sesame oil. Toss gently to coat every piece and let the tuna marinate for about 10 minutes. This quick soak infuses every bite with bold flavor while keeping the tuna’s natural taste front and center.
Step 3: Assemble Your Tuna Sushi Bowl
To build your Tuna Sushi Bowl, start by spooning a generous serving of just-warm sushi rice into the base of your bowl. Now layer your marinated tuna right on top—don’t forget to drizzle that extra marinade over the rice! Scatter on the diced avocado and shelled edamame for gorgeous color and texture, then arrange a small pile of pickled ginger. That mix of creamy, crunchy, and zingy is pure magic.
Step 4: Serve and Enjoy
Your Tuna Sushi Bowl is ready to be devoured! Serve immediately while everything is fresh. Don’t be afraid to get creative with chopsticks, spoons, or just dive right in. The beautiful simplicity here lets each ingredient shine, making every mouthful as satisfying as any sushi roll at your favorite spot.
How to Serve Tuna Sushi Bowl
Garnishes
Garnishing your Tuna Sushi Bowl is all about dialing up flavor and appeal. Sprinkle on toasted sesame seeds or sliced green onions for that extra punch of color and crunch. A dab of wasabi, a drizzle of spicy mayo, or a shake of furikake seasoning will bring your bowl to the next level. Don’t hold back—even a few nori strips or a squeeze of lime can make every bite sing.
Side Dishes
Pair your Tuna Sushi Bowl with simple, refreshing sides to round out your meal. A crisp seaweed salad, a bowl of miso soup, or some steamed edamame with sea salt are effortless partners. These light sides add texture and variety, and keep the spotlight on your stunning homemade sushi bowl.
Creative Ways to Present
For a dinner party twist, serve the ingredients deconstructed and let everyone build their own Tuna Sushi Bowl. Or use small glass jars for a portable, picnic-ready version. Try shaping the rice into small domes and layering the toppings artfully for a sushi-inspired platter at your next gathering—the possibilities are endless!
Make Ahead and Storage
Storing Leftovers
If you have leftovers (lucky you!), keep the toppings and rice stored separately in airtight containers in the fridge. This helps each component maintain its best texture and flavor. The Tuna Sushi Bowl is best enjoyed within 24 hours, especially when using raw tuna.
Freezing
Freezing isn’t recommended if you’re using raw, sushi grade tuna, as freezing can affect its delicate texture and safety. If you’ve made your Tuna Sushi Bowl with cooked tuna, you can freeze the rice portions separately. Always let things come to room temperature before freezing, and pack in single-serve amounts for convenience.
Reheating
Gently reheat sushi rice in the microwave with a damp paper towel to restore its soft, sticky consistency. The tuna and other toppings should always be enjoyed cold or at room temperature for best texture and flavor, so add those after the rice has been warmed.
FAQs
Can I use canned tuna instead of sushi grade?
Absolutely! While sushi grade tuna is a treat, canned tuna works beautifully for a more budget-friendly or speedy Tuna Sushi Bowl. Just drain well and use good-quality canned tuna packed in water or olive oil for best results.
Is it safe to eat raw tuna at home?
If you choose to use raw tuna, always buy labeled “sushi grade” from a trusted fishmonger and handle it with care. If in doubt, stick with cooked tuna—it’s equally delicious in this bowl!
What other toppings can I add?
Feel free to get creative! Thinly sliced cucumbers, shredded carrots, sliced radish, or seaweed salad are perfect extras. The beauty of the Tuna Sushi Bowl is how easily it adapts to your taste and what’s in your pantry.
How can I make this gluten free?
Swap regular soy sauce for a gluten-free version or use tamari, which offers the same savory note. Always double-check labels, especially for pickled ginger and other condiments.
Can I prep ingredients in advance?
Definitely! You can cook the rice and chop veggies ahead of time. For raw tuna, dice and marinate just before serving for maximum freshness. Keeping every ingredient chilled and separate makes assembly a breeze at mealtime.
Final Thoughts
There’s something truly special about building and enjoying your own Tuna Sushi Bowl at home. Whether you’re new to sushi flavors or a true fanatic, this recipe makes restaurant-quality taste accessible and fun. Give it a try—you’ll be blown away by just how delicious, flexible, and crave-worthy your new favorite bowl can be!
PrintTuna Sushi Bowl Recipe

This Tuna Sushi Bowl recipe gives you all the flavors of sushi in a convenient bowl form. With fresh tuna, creamy avocado, and savory soy sauce, every bite is a taste of Japan.
- Prep Time: 15 minutes
- Cook Time: 20 minutes
- Total Time: 35 minutes
- Yield: 2 servings 1x
- Category: Main Course
- Method: Mixing, Assembling
- Cuisine: Japanese
- Diet: Pescatarian
Ingredients
Sushi Bowl:
- 1 cup sushi rice
Tuna:
- 4 oz fresh sushi-grade or cooked tuna, diced
- 1 tablespoon soy sauce
- 1 teaspoon sesame oil
Additional Ingredients:
- 1 avocado, diced
- 1/2 cup edamame, shelled
- 1 tablespoon pickled ginger
Instructions
- Cook Sushi Rice: Cook sushi rice according to package instructions and let cool slightly.
- Marinate Tuna: Marinate diced tuna in soy sauce and sesame oil for 10 minutes.
- Assemble Bowl: Add sushi rice at the bottom of a bowl. Top with marinated tuna, avocado, edamame, and pickled ginger.
- Serve: Serve immediately.
Nutrition
- Serving Size: 1 bowl
- Calories: 450
- Sugar: 2g
- Sodium: 600mg
- Fat: 15g
- Saturated Fat: 2g
- Unsaturated Fat: 10g
- Trans Fat: 0g
- Carbohydrates: 60g
- Fiber: 6g
- Protein: 20g
- Cholesterol: 25mg
Keywords: Tuna Sushi Bowl, Sushi Bowl Recipe, Tuna Bowl, Japanese Bowl

