
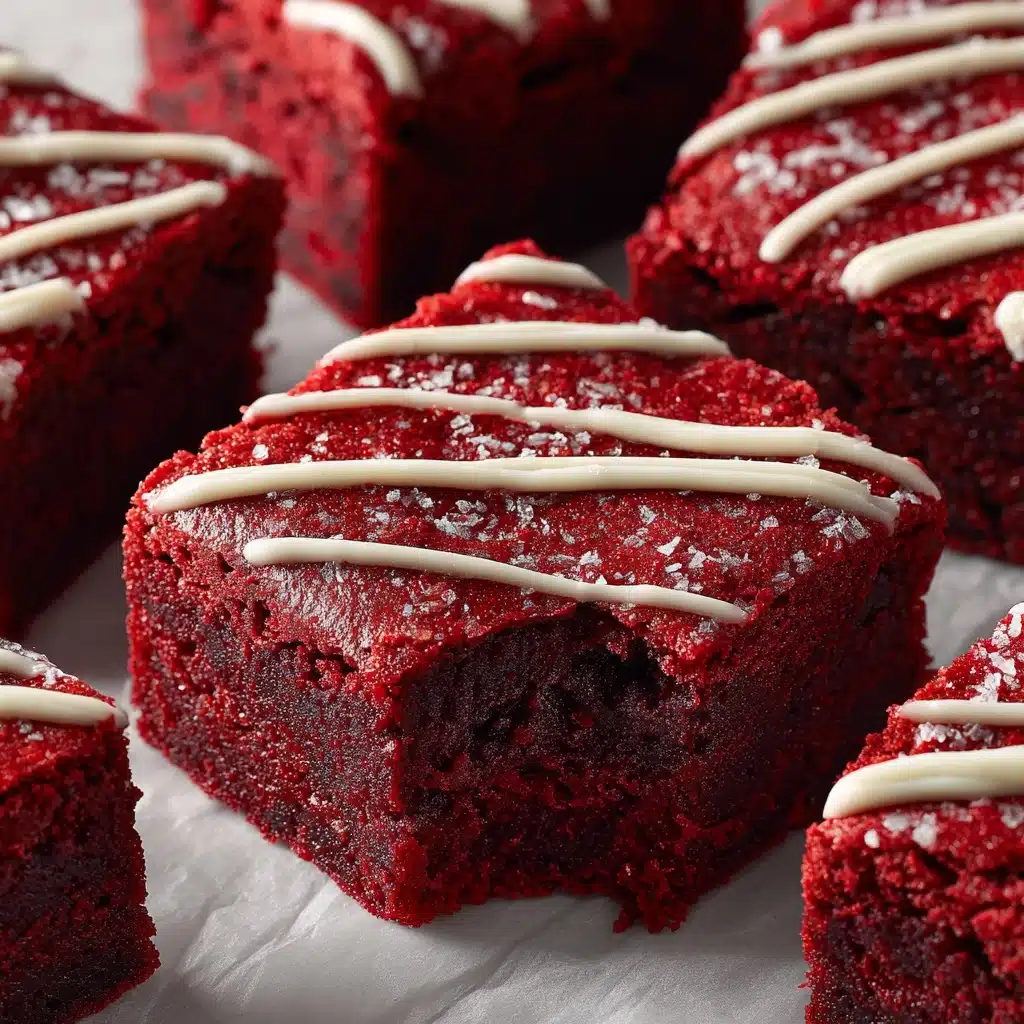
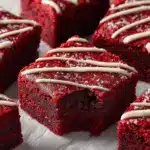
Red Velvet Brownies Recipe
Sink your teeth into pure decadence with these Red Velvet Brownies, a luscious fusion of rich chocolate and a signature red hue that will steal the show at any gathering. Imagine the bold flavors of a classic red velvet cake, with the extra fudgy, chewy bite only a brownie can deliver. Whether you’re a long-time red velvet fan or a curious newcomer, this treat is impossible to resist — easy to whip up, absolutely gorgeous, and always a crowd-pleaser.
Ingredients You’ll Need
Ingredients You’ll Need
You don’t need a complicated shopping list to make something spectacular! Each of these ingredients plays a starring role in creating the unforgettable taste, perfect texture, and vibrant color of Red Velvet Brownies. Gather them up and let’s get baking.
- Unsalted butter (3/4 cup, melted): Creates an ultra-rich base and brings all the flavors together for that moist, fudgy bite.
- Semi-sweet chocolate bar (2 oz, chopped): Adds depth and an irresistible chocolatey edge; use a good quality bar for best flavor.
- Granulated sugar (1 & 1/4 cup): Balances all the bittersweet notes and gives that classic brownie crackly top.
- Large eggs (2): Give structure and allow for that irresistible chewy texture brownies are famous for.
- Vanilla extract (2 tsp): Rounds out the boldness of chocolate and adds a hint of warmth throughout every bite.
- White vinegar (1 tsp): Essential for the authentic “red velvet” flavor and helps brighten the red coloring.
- Red gel food coloring (1/2 tbsp): Provides that show-stopping, vibrant red color — gel food coloring gives the most intense effect.
- Unsweetened cocoa powder (2 tbsp): Infuses the batter with a subtle cocoa undertone that makes red velvet truly unforgettable.
- All-purpose flour (1 & 1/4 cup): The backbone of the brownies, lending just the right amount of density and lift.
- Salt (1/4 tsp): Sharply enhances all those sweet and chocolatey flavors so nothing feels flat.
- White chocolate chips (1/2 cup, optional): Toss inside the batter for creamy bursts, or melt and drizzle on top for extra pizzazz.
How to Make Red Velvet Brownies
Step 1: Prep Your Pan and Preheat
Begin by setting your oven to 350°F — you want it nice and toasty before your batter goes in. Line your 8×8 inch baking pan with parchment paper, making sure it hangs over the sides for an easy lift-out later. This simple prep guarantees your brownies will never stick and makes for quick, clean slicing.
Step 2: Melt the Butter & Chocolate
In a large microwave-safe mixing bowl, combine the melted butter and chopped semi-sweet chocolate bar. Microwave in 30-second bursts, stirring after each until it’s silky smooth. This step is where that signature fudgy richness starts, so mix until every chunk has melted for a glossy base.
Step 3: Mix in Sugar, Eggs, and Flavorings
To your warm chocolate mixture, add granulated sugar and stir to combine. Then, add the eggs one at a time, mixing well so everything becomes super glossy and thick. Stir in the vanilla extract, white vinegar, and, of course, the red gel food coloring. The color will be vibrant and mesmerizing — this is where your Red Velvet Brownies really come to life!
Step 4: Combine Dry Ingredients
Grab a separate bowl and sift together the unsweetened cocoa powder, all-purpose flour, and salt. Sifting breaks up any lumps and ensures your dry ingredients blend smoothly into the batter, creating the stunning crumb you want. This also boosts the cocoa flavor, keeping it evenly distributed.
Step 5: Mix Wet and Dry, Add White Chocolate Chips (Optional)
Gently fold the dry mixture into the wet ingredients, mixing just until no streaks of flour remain. Don’t overmix — it keeps your brownies tender! If you love surprises of creamy white chocolate in every bite, fold in the white chocolate chips now. You’re aiming for a thick, velvety-red batter.
Step 6: Pour & Smooth the Batter
Pour the luscious batter into your prepared pan and spread it evenly with a spatula. Take a moment to smooth the top — it will bake up level and look bakery-perfect, ready for any topping or drizzle you have in mind.
Step 7: Bake to Fudgy Perfection
Slide the pan into your preheated oven and bake for 30 to 35 minutes. The brownies are ready when a toothpick inserted into the center pulls out with a few moist crumbs (not wet batter). This is the sweet spot for chewy, fudgy Red Velvet Brownies. Don’t overbake!
Step 8: Cool Before Slicing
Let the brownies cool completely in the pan — patience pays off here, as cutting too early leads to a gooey mess. Once cool, use the parchment paper edges to lift them out and slice into perfect squares.
Step 9: White Chocolate Drizzle (Optional)
For a finishing flourish, melt some white chocolate and drizzle it over the cooled brownies. Let it set for a few minutes before slicing. This touch brings irresistible sweetness and a gorgeous pop of contrast to your Red Velvet Brownies.
How to Serve Red Velvet Brownies

Garnishes
Sprinkle the tops with extra white chocolate chips, dust with a touch of powdered sugar, or add a scattering of fresh berries for brightness. A white chocolate drizzle makes these brownies stand out on any dessert table and adds just the right hint of creaminess. You can even add a few sprigs of fresh mint for a pop of color.
Side Dishes
Serve your Red Velvet Brownies alongside a scoop of vanilla ice cream, lightly sweetened whipped cream, or even a tangy swirl of raspberry coulis if you want a touch of fruity contrast. For something a bit more decadent, pair with a cup of rich hot chocolate or a creamy latte — the combo is pure heaven!
Creative Ways to Present
Stack the brownies on a tiered tray for a stunning high-tea effect, or cut them into tiny bite-sized cubes for party platters. Skewer them on lollipop sticks for “brownie pops,” or set them atop mini milkshakes as an over-the-top garnish. Packaging them in cute boxes also makes them a delightful edible gift for friends or coworkers.
Make Ahead and Storage
Storing Leftovers
Store any extra Red Velvet Brownies in an airtight container at room temperature for up to four days. They stay moist and fudgy, and the flavor deepens slightly, making tomorrow’s snack even better! If your kitchen runs warm, move them to the fridge for extra preservation.
Freezing
Yes, Red Velvet Brownies freeze beautifully! Wrap individual squares tightly in plastic wrap, then tuck them into a freezer-safe bag or container. They’ll keep for up to three months. When you’re craving one, just defrost at room temperature or give a gentle microwave zap until soft.
Reheating
To refresh your brownies after storing or freezing, pop one in the microwave for 10–15 seconds — just until warmed through. The chocolate chips inside will become gooey again, and every bite will taste bakery-fresh. Avoid overheating, or you might lose some of that fudgy magic.
FAQs
Can I use liquid food coloring instead of gel for Red Velvet Brownies?
You can substitute liquid coloring, but gel food coloring yields a much deeper red color with less product. If you use liquid, you may need a bit more and might notice a more muted color, but the brownies will still taste delicious!
Should the brownies be cakey or fudgy?
Red Velvet Brownies should be delightfully fudgy and chewy, just like classic brownies. The recipe is designed for richness and moisture, but if you prefer them more cake-like, add another egg to the batter.
Can I add nuts or other mix-ins?
Absolutely! Chopped pecans, walnuts, or even dark chocolate chunks mix in well and add a little textural surprise. Fold them in with the white chocolate chips or swap them out entirely based on your preferences.
How do I know when the brownies are done?
Insert a toothpick in the center after around 30 minutes; if it comes out with a few moist crumbs (not runny batter), they’re ready. Every oven is a bit different, so start checking on the earlier side to avoid overbaking.
Can these brownies be made gluten-free?
Yes! Just replace the all-purpose flour with a good-quality 1:1 gluten-free baking blend. The result is nearly identical in taste and texture, so everyone can enjoy a square (or two).
Final Thoughts
If you’ve never tried homemade Red Velvet Brownies, now’s the perfect moment to treat yourself (and everyone lucky enough to be nearby!). They’re the kind of dessert that sparks joy from the moment you mix the batter to the last crumb on your plate. Gather your ingredients and give them a go — your kitchen is about to smell amazing!
PrintRed Velvet Brownies Recipe
Indulge in these decadent Red Velvet Brownies that are rich, moist, and loaded with chocolate flavor. These vibrant and fudgy treats are perfect for any occasion, from holiday gatherings to everyday desserts.
- Prep Time: 15 minutes
- Cook Time: 30-35 minutes
- Total Time: 50 minutes
- Yield: 16 brownies 1x
- Category: Dessert
- Method: Baking
- Cuisine: American
- Diet: Vegetarian
Ingredients
Brownie Batter:
- 3/4 cup unsalted butter (melted)
- 2 oz chopped semi-sweet chocolate bar
- 1 & 1/4 cup granulated sugar
- 2 large eggs
- 2 teaspoon vanilla extract
- 1 teaspoon white vinegar
- 1/2 tablespoons red gel food coloring
- 2 tablespoons unsweetened cocoa powder
- 1 & 1/4 cup all-purpose flour
- 1/4 teaspoon salt
Optional Additions:
- 1/2 cup white chocolate chips (optional mixed in the batter or melted and drizzled on top of the brownies)
Instructions
- Preheat Oven: Preheat your oven to 350°F and line an 8×8 inch baking pan with parchment paper.
- Melt Butter and Chocolate: In a large microwave-safe mixing bowl, melt the butter and chopped chocolate in the microwave in 30-second increments. Stir until fully melted.
- Combine Wet Ingredients: Add granulated sugar, then mix in eggs one at a time, followed by vanilla extract, white vinegar, and red food coloring.
- Sift Dry Ingredients: In a separate bowl, sift together cocoa powder, flour, and salt.
- Combine Batter: Gradually add dry ingredients to wet ingredients, mixing until just combined. Fold in white chocolate chips if desired.
- Bake: Pour batter into the prepared pan and bake for 30-35 minutes until a toothpick inserted comes out with a few moist crumbs.
- Cool and Serve: Let the brownies cool completely in the pan before cutting into squares. Optionally, drizzle melted white chocolate on top before slicing.
Notes
- You can customize these brownies by adding nuts or cream cheese frosting.
- For a richer flavor, use dark chocolate instead of semi-sweet.
Nutrition
- Serving Size: 1 brownie
- Calories: 240
- Sugar: 18g
- Sodium: 110mg
- Fat: 14g
- Saturated Fat: 8g
- Unsaturated Fat: 4g
- Trans Fat: 0g
- Carbohydrates: 28g
- Fiber: 1g
- Protein: 3g
- Cholesterol: 55mg
Keywords: Red Velvet Brownies, Chocolate, Dessert, Baking, Easy Recipe