
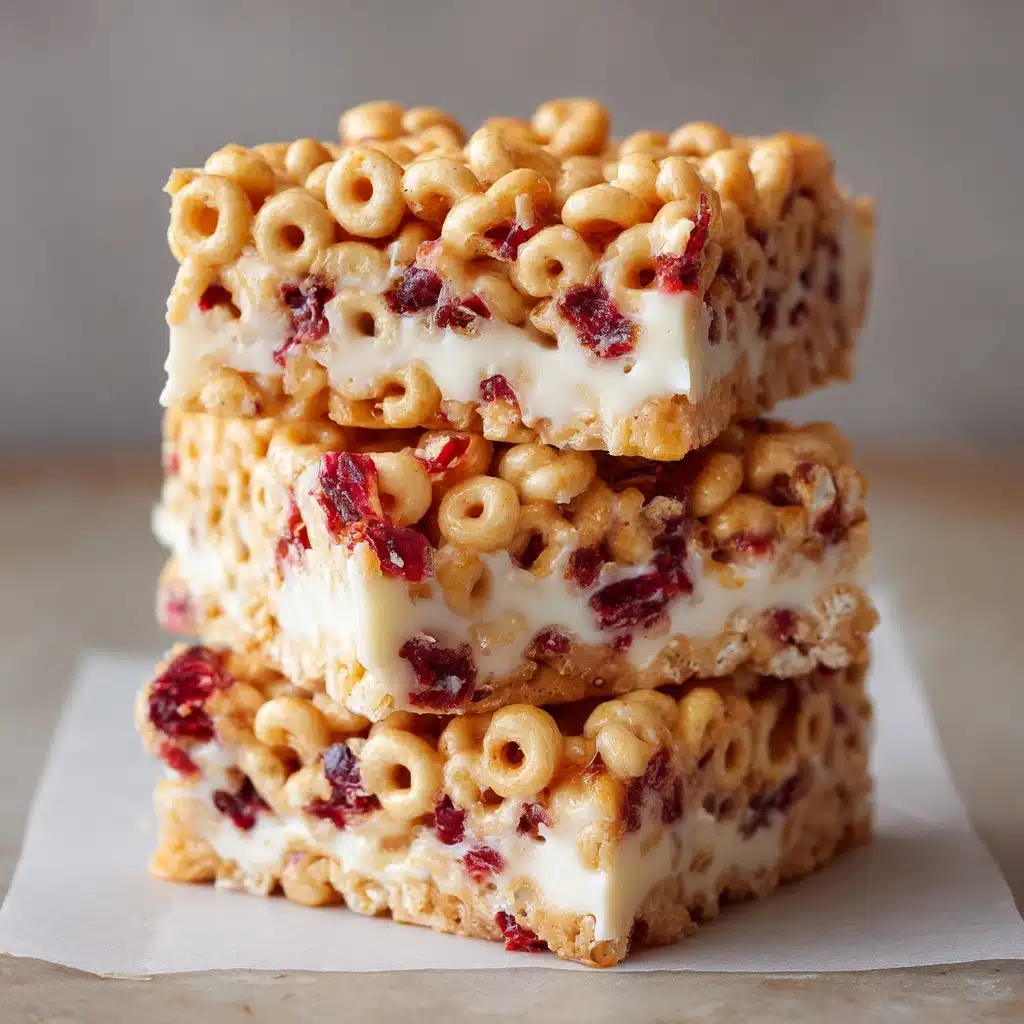
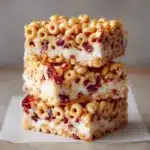
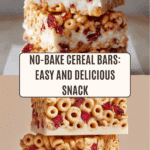
Cereal Bars Recipe
Get ready to meet your new snacking obsession! These Cereal Bars are the ultimate homemade treat that strikes the perfect balance between nostalgia, convenience, and a satisfying crunch. With only a handful of wholesome ingredients and endless ways to personalize, these bars are made for lunchboxes, road trips, or that mid-afternoon pick-me-up. If you love a quick, no-bake recipe that brings chewy, sweet, and nutty flavors together in every bite, then you’re absolutely going to be hooked on this batch of easy Cereal Bars.
Ingredients You’ll Need
You won’t believe how just a few everyday pantry staples transform into something as delicious as these bars. Each ingredient brings its own magic: from irresistible crunch to natural sweetness and creamy texture—everything plays a role in making these Cereal Bars a snack you’ll crave on repeat.
- 3 cups cereal of choice: Your favorite crunchy cereal is the heart of these bars; try rice crisps, cornflakes, or even multigrain clusters for something different.
- 2/3 cup peanut butter or nut butter of choice: This creamy base gives the bars richness, holds everything together, and adds that delightful nutty flavor.
- 1/2 cup agave, honey, or brown rice syrup: Your choice of sticky sweetener binds the ingredients together and provides just the right touch of sweetness.
- Optional 1/2 tsp salt: A dash of salt really amps up the flavors, contrasting with the sweetness and deepening the nutty notes.
- Optional 3 tbsp protein powder: Sneak in a little extra protein—great if you want these bars to double as a more robust snack!
How to Make Cereal Bars
Step 1: Prepare Your Pan
Line an 8-inch square pan with wax or parchment paper, letting the edges hang over for easy lifting later. If you’re making a bigger batch, you can double the recipe and use a 9×13-inch pan. This simple step means no sticking and effortless cleanup, so you can get right to the eating part!
Step 2: Warm Your Nut Butter
If your peanut butter or nut butter is stiff, briefly warm it in the microwave or on the stovetop until it’s easily stirrable. This trick makes mixing all your ingredients a breeze and helps the Cereal Bars hold together with a creamy, even texture.
Step 3: Combine All Ingredients
In a large mixing bowl, stir together your cereal, nut butter, chosen sweetener, and any optional add-ins like salt or protein powder. Make sure each piece of cereal gets an even coating for perfectly uniform bars that won’t fall apart later.
Step 4: Press Mixture Into the Pan
Scoop the sticky mixture into your prepared pan. Place another sheet of parchment or wax paper on top, then press down with your hands or the bottom of a measuring cup. Pressing firmly is the secret to bars that slice clean and hold their shape—don’t be shy!
Step 5: Chill and Slice
Pop the pan in the freezer for at least 30 minutes, or until the mixture is solid enough to slice cleanly. Lift the slab out using your parchment “handles” and cut into bars with a sharp knife. That’s it—your Cereal Bars are ready for snacking!
How to Serve Cereal Bars

Garnishes
Top your Cereal Bars with a handful of chocolate chips, a drizzle of melted dark chocolate, or a sprinkle of flaky sea salt for that extra wow factor. A scattering of chopped dried fruit or toasted coconut on top adds color and a brilliant finishing touch.
Side Dishes
Pair these bars with a creamy yogurt parfait, a glass of cold milk, or a bowl of fresh berries to turn snack time into a mini feast. They’re also a fantastic addition to a brunch spread alongside fruit, muffins, or even a smoothie bowl.
Creative Ways to Present
Cut the Cereal Bars into fun shapes using cookie cutters or wrap each one in parchment paper for a “grab and go” treat. Layer them in a box for a sweet homemade gift or make mini bars for party platters and lunchbox surprises.
Make Ahead and Storage
Storing Leftovers
Store leftover Cereal Bars in an airtight container at room temperature if your kitchen is cool and dry. For warmer climates, the fridge is your friend—they’ll keep their texture for up to a week and stay delightfully chewy.
Freezing
Cereal Bars freeze beautifully! Simply separate layers with parchment paper, seal tightly, and freeze for up to two months. Thaw at room temperature or enjoy straight from the freezer for a firmer, frosty snack.
Reheating
If you prefer your bars a bit softer, pop them in the microwave for just 5–10 seconds. They’ll be gooey and extra-luscious, almost like a warm cookie bar—but for the most part, these are meant to be enjoyed cold or at room temp.
FAQs
Can I use gluten-free cereal for these bars?
Absolutely! Just be sure the cereal you pick is certified gluten-free and doesn’t contain any added malt or wheat. The rest of the ingredients are naturally gluten-free, so this recipe easily adapts for anyone who needs it.
Can I swap out the nut butter?
Yes! Almond butter, cashew butter, sunflower seed butter, or even tahini all work—just choose one that you love the flavor of. The key is to use a spread that’s nice and creamy so your Cereal Bars hold together perfectly.
What are some fun ways to customize the bars?
Mix in mini chocolate chips, chopped nuts, dried cranberries, or even a twist of citrus zest. Different cereals will give you a whole new texture, and a sprinkling of cinnamon or a splash of vanilla extract can take the flavor up a notch.
How do I keep the bars from crumbling apart?
The secret is pressing down the mixture very firmly in the pan—don’t rush this step! Also, be sure to chill thoroughly before slicing, and be generous with the sticky sweetener, since that’s what binds everything together.
Are these bars suitable for kids’ lunchboxes?
Definitely! These Cereal Bars are nutty, sweet, and satisfyingly chewy—kids love them. If nuts are an allergy concern, sunflower seed butter is a great alternative, and you can choose nut-free cereal so everyone gets to enjoy a treat.
Final Thoughts
If you’re looking for a treat that’s endlessly adaptable, quick to prepare, and guaranteed to disappear fast, give these Cereal Bars a try! I can’t wait for you to discover just how delicious homemade snacking can be, and I have a feeling your friends and family will ask for these again and again.
PrintCereal Bars Recipe
These homemade cereal bars are a delightful and wholesome snack option. They are easy to make and customizable with different cereals and add-ins.
- Prep Time: 15 minutes
- Cook Time: 0 minutes
- Total Time: 45 minutes
- Yield: 12 bars 1x
- Category: Snack
- Method: Mixing, Freezing
- Cuisine: American
- Diet: Vegetarian
Ingredients
Main Ingredients:
- 3 cups cereal of choice
- 2/3 cup peanut butter or nut butter of choice
- 1/2 cup agave, honey, or brown rice syrup
Optional:
- 1/2 tsp salt
- 3 tbsp protein powder
Instructions
- Prepare the Pan: Line an 8-inch pan with wax or parchment paper. If using a larger pan, adjust quantities accordingly.
- Mix Ingredients: Warm the nut butter if needed to make it stirrable. In a large bowl, mix together the cereal, nut butter, sweetener, salt, and protein powder (if using).
- Press into Pan: Transfer the mixture into the prepared pan. Cover with another sheet of parchment paper and press down firmly to compact the mixture.
- Chill and Slice: Place the pan in the freezer for about 30 minutes or until the mixture is firm. Once set, remove from the pan and cut into bars. Store the bars in the refrigerator, freezer, or in a cool, dry place.
Notes
- Experiment with different cereals and mix-ins to create various flavor combinations.
- Ensure to press the mixture firmly into the pan to prevent the bars from crumbling.
Nutrition
- Serving Size: 1 bar
- Calories: 180
- Sugar: 9g
- Sodium: 150mg
- Fat: 10g
- Saturated Fat: 2g
- Unsaturated Fat: 6g
- Trans Fat: 0g
- Carbohydrates: 18g
- Fiber: 2g
- Protein: 6g
- Cholesterol: 0mg
Keywords: Cereal Bars, Homemade Snack, Nut Butter, Easy Recipe


